
Creating a Custom Avatar
Start a chat with Blu from the Avatars page, describe the character you want, and get a main reference image and reference slots to build on.
Overview
A custom avatar starts as a conversation with Blu, Intempt's AI chat panel, not a form. This guide walks through the three ways to start that conversation from the Avatars page, what to describe, and what you get back once Blu finishes: a character record with a main reference image, ready to open and refine.
How it works
Every entry point for creating a custom avatar opens the same thing: Blu, scoped to the avatar skill. You describe the character in your own words (or attach a file, or send a pre-filled prompt), and Blu creates the character record and a main reference image once the conversation produces one. The console doesn't navigate you anywhere when that happens. The new avatar simply appears in the Avatars grid, because the grid and the chat share the same live data, and you open it yourself once it's there.
Getting started
Opening Avatars
Click Avatars in the console sidebar, under Design (path /avatars).
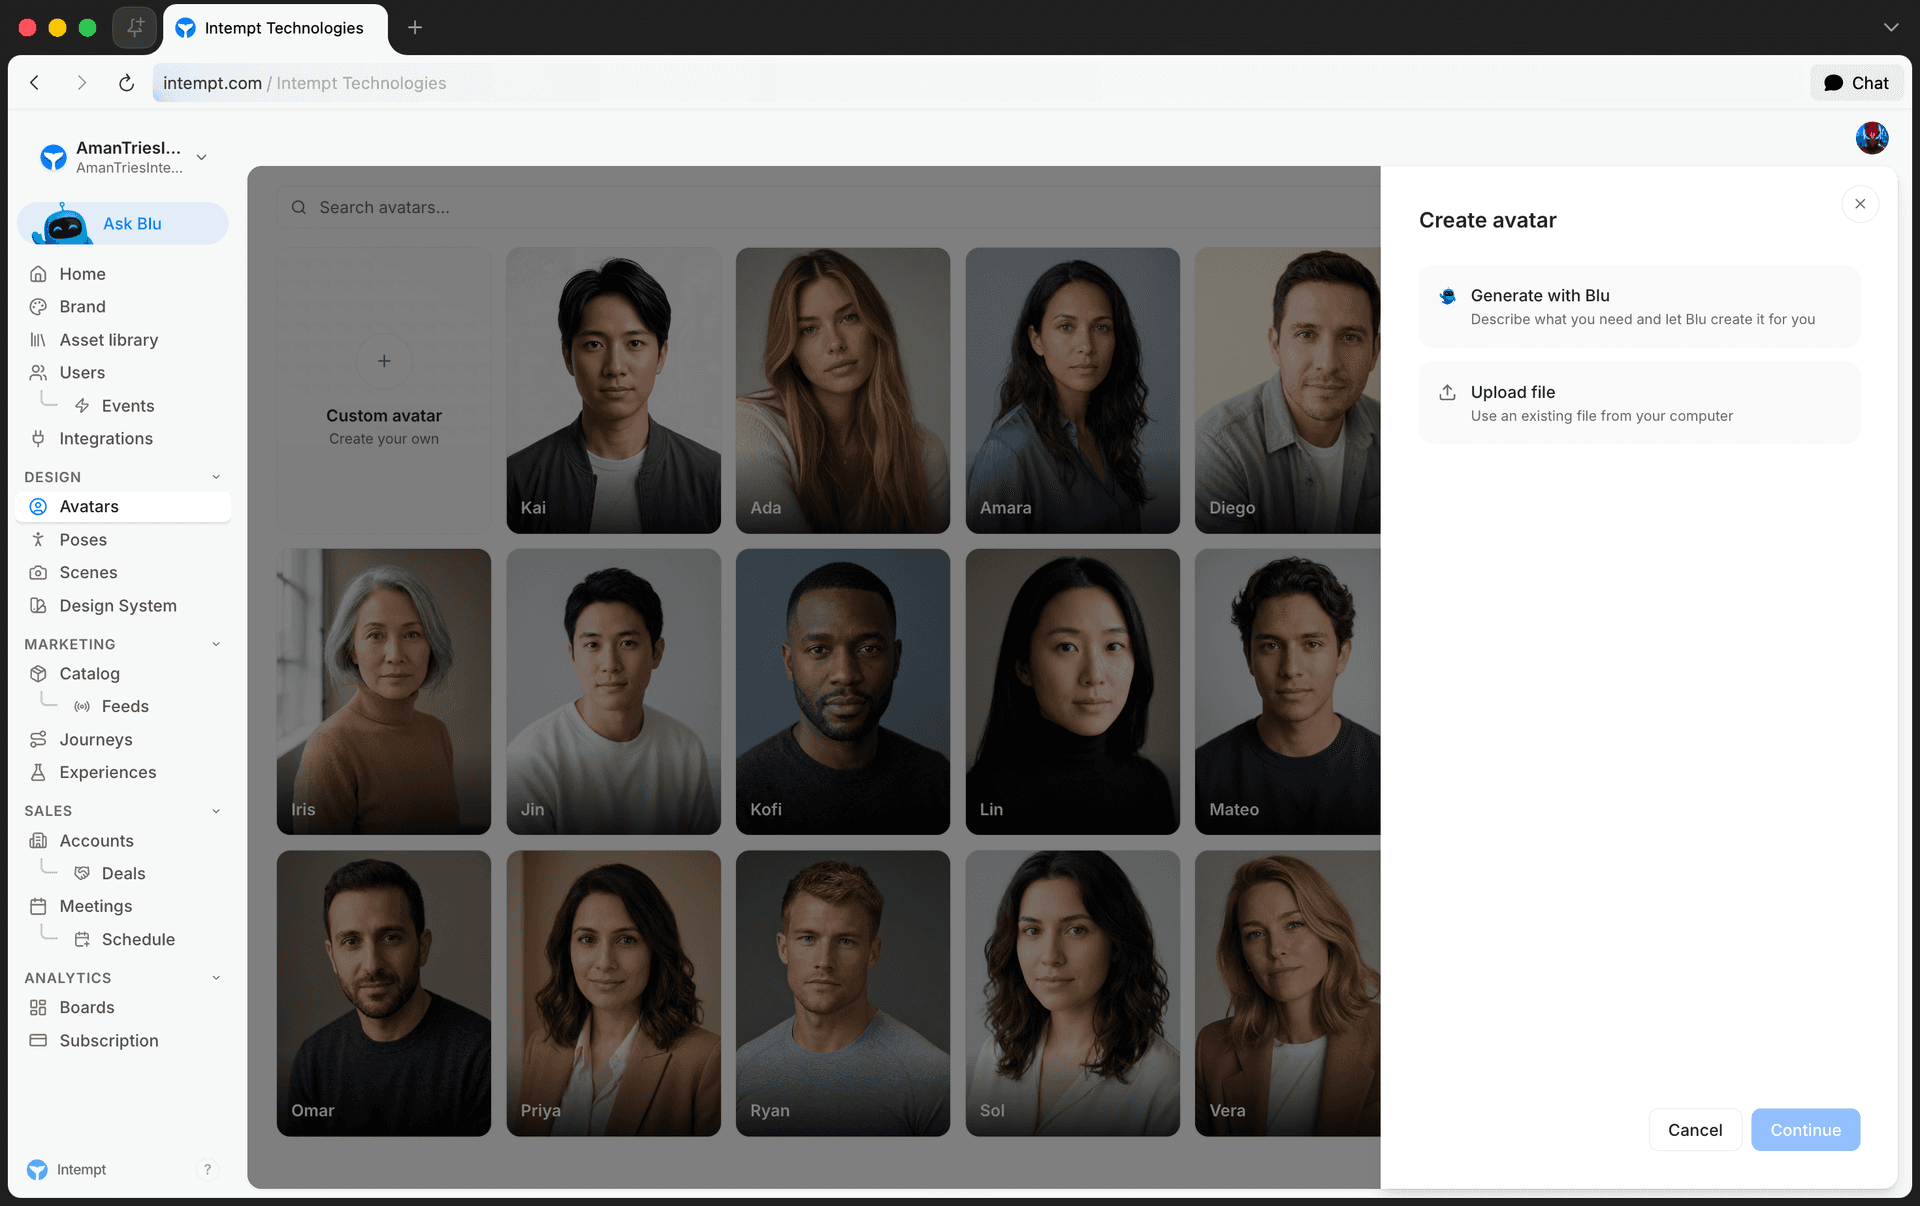
Starting from the Create avatar button
- Click Create avatar, on the right side of the toolbar above the avatar grid.
- Choose Generate with Blu to open Blu with an empty chat, or Upload file to attach a
.md,.txt, or.jsonfile describing the character. Upload file sends "Create a brand character from the attached file" to Blu right away, with your file attached. There's no separate confirmation step.
Starting from the Custom avatar tile
A dashed Custom avatar tile sits at the front of the grid, before every existing character.
- Click the Custom avatar tile.
- Blu opens and immediately sends the prompt "Create a new avatar from scratch. I'll describe them and upload reference photos." on your behalf. You don't type or confirm anything first.
Describing the character in chat
However you started the conversation, this is where you tell Blu who the character is. Nothing about the character exists yet, so be as specific as you want to be:
- Name, category, and a short description.
- Demographics: gender, age range, ethnicity, build.
- Wardrobe, appearance details, and photography notes (lighting, angles).
- Voice: a description of how the character should sound.
📘 Good to know
Use 1–3 clear reference photos with good lighting if you're uploading your own images, and include different angles for the best consistency across the images Blu generates.
Getting your character record
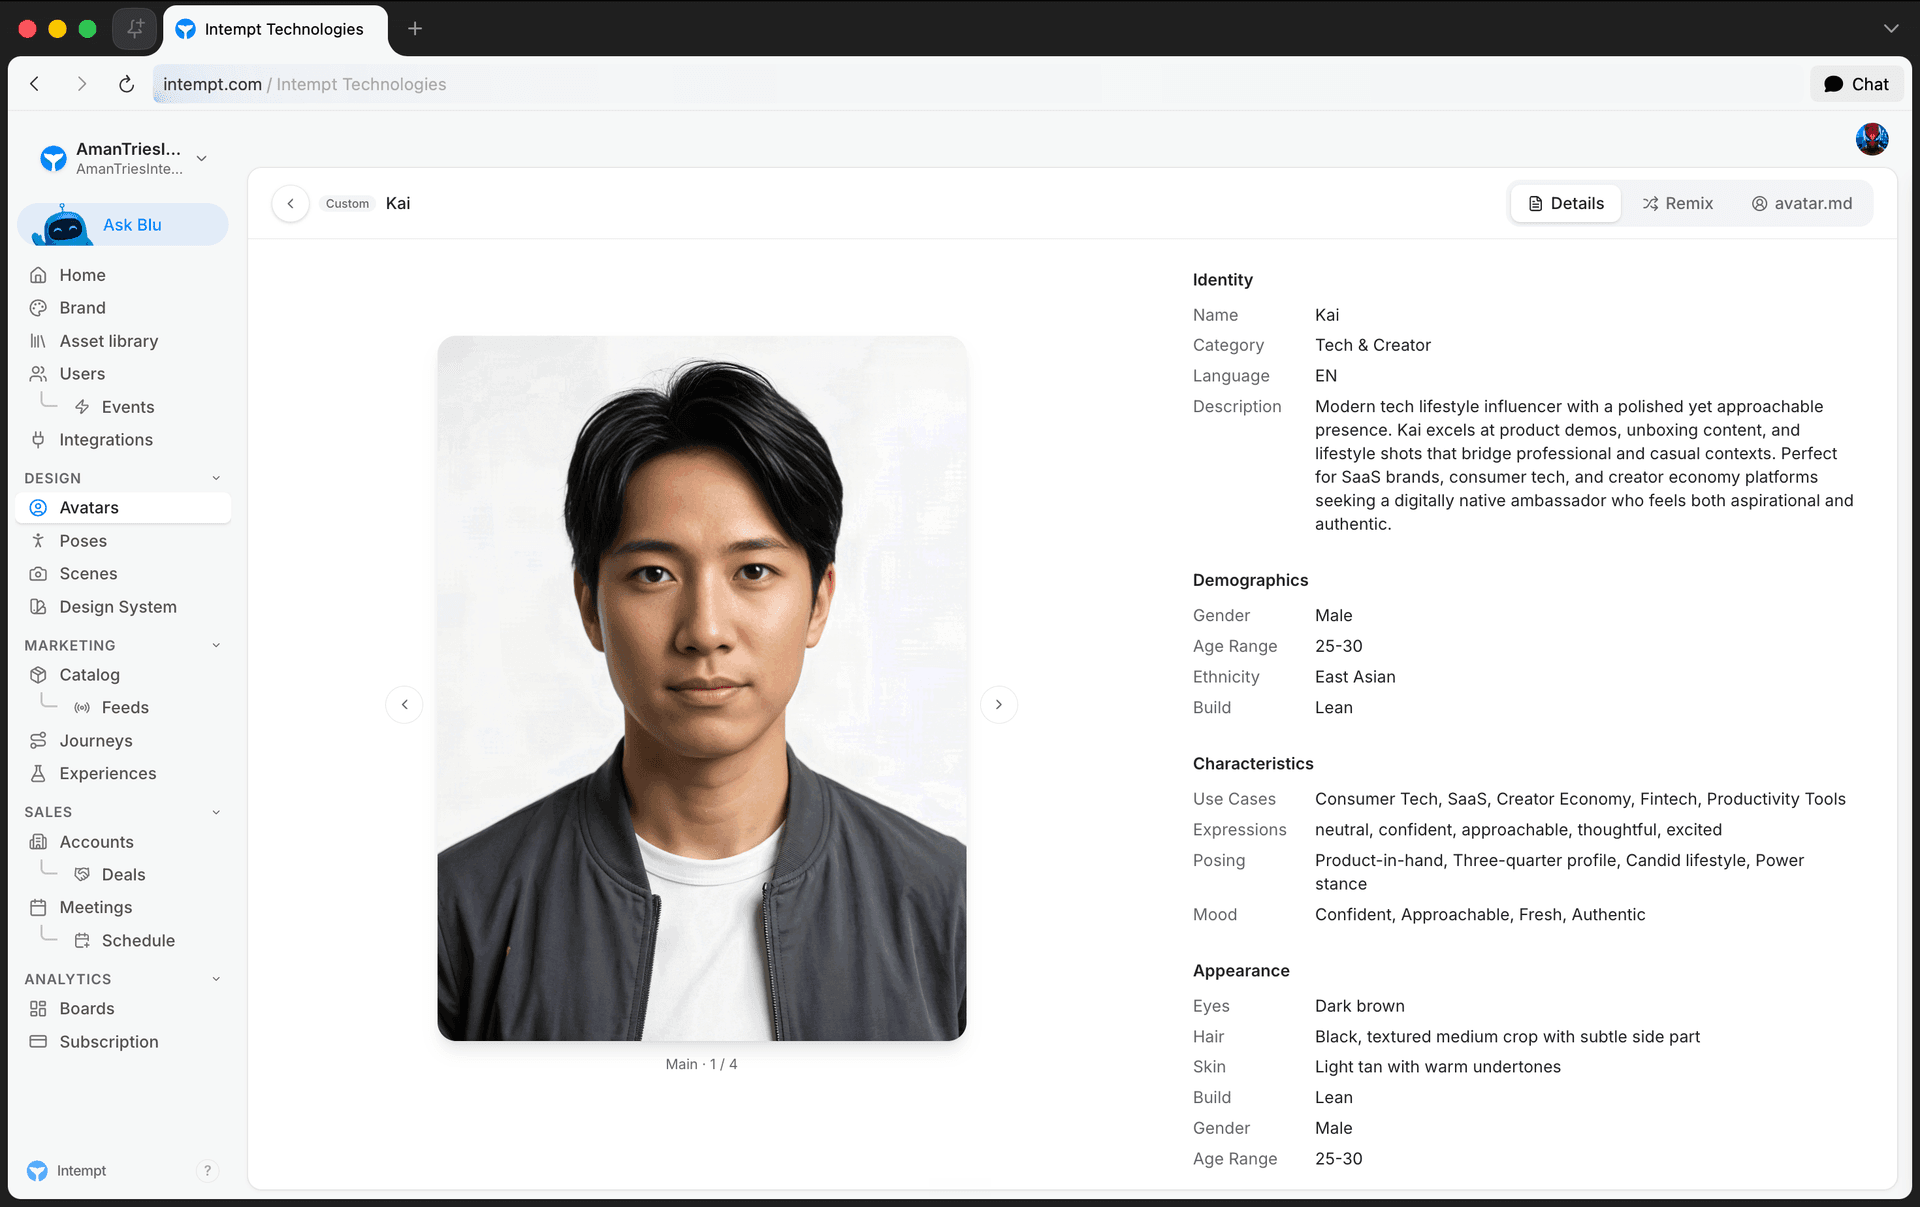
Once the conversation gives Blu enough to work with, it creates the character and generates a main reference image. The new avatar appears in the Avatars grid without a page reload. Click it to open its detail page.
What you get, and what to do next
The character detail page opens with:
- A main reference image, generated from your description, in an image viewer that pages through the character's generated images (Main, Three-quarter, and so on) using the arrows below it.
- A Details panel on the right, grouping everything Blu captured about the character into sections: Identity (name, category, language, description), Demographics (gender, age range, ethnicity, build), Characteristics (use cases, expressions, posing, mood), Appearance (eyes, hair, skin, build, gender, age range), Wardrobe (style entries), Voice (description plus Stability/Similarity/Style/Speed sliders), and Photography Notes.
- An avatar.md tab next to Details, showing the character's full markdown brief.
See Avatars Overview for the full breakdown of the character detail page.
Where to go next
- Avatars Overview – browsing the library, the full character detail page, and presets vs. custom avatars.
- Brand Kit – manage your brand's broader identity, styles, and voice.
Avatars Overview
Avatars is Intempt's AI brand-character library, where you browse built-in presets and your own custom characters, then generate identity-consistent images, voice, and renders for each one.
Managing Avatar Emotions
The Emotions picker on a custom avatar's detail page generates up to 9 additional renders of that character, each showing a different emotion, without leaving the page.