
Basic Intempt installation
Create an API key, connect a JavaScript source, and start tracking autocaptured and custom events on your website.
Overview
When you implement Intempt, you add Intempt code to your website, app, or server. This code sends event data to Intempt based on the triggers you define. In a basic implementation, that's a JavaScript snippet you paste into your site's HTML to track page views and clicks automatically. It can also be as detailed as a custom event you fire from your own code, with a user ID and attributes attached.
This guide walks through the JavaScript installation: creating an API key, connecting a source, and sending your first custom events.
Before you begin
You need:
- An Intempt account with an organization and project. If you don't have one yet, sign up for a free account.
- Access to the source code for the website you want to track.
📘 Good to know
Consider using separate projects for production and any development or staging environment, so test traffic doesn't mix with real customer data.
Installing Intempt
Step 1: Create your API key
The API key tells Intempt which organization and project incoming data belongs to.
To create one:
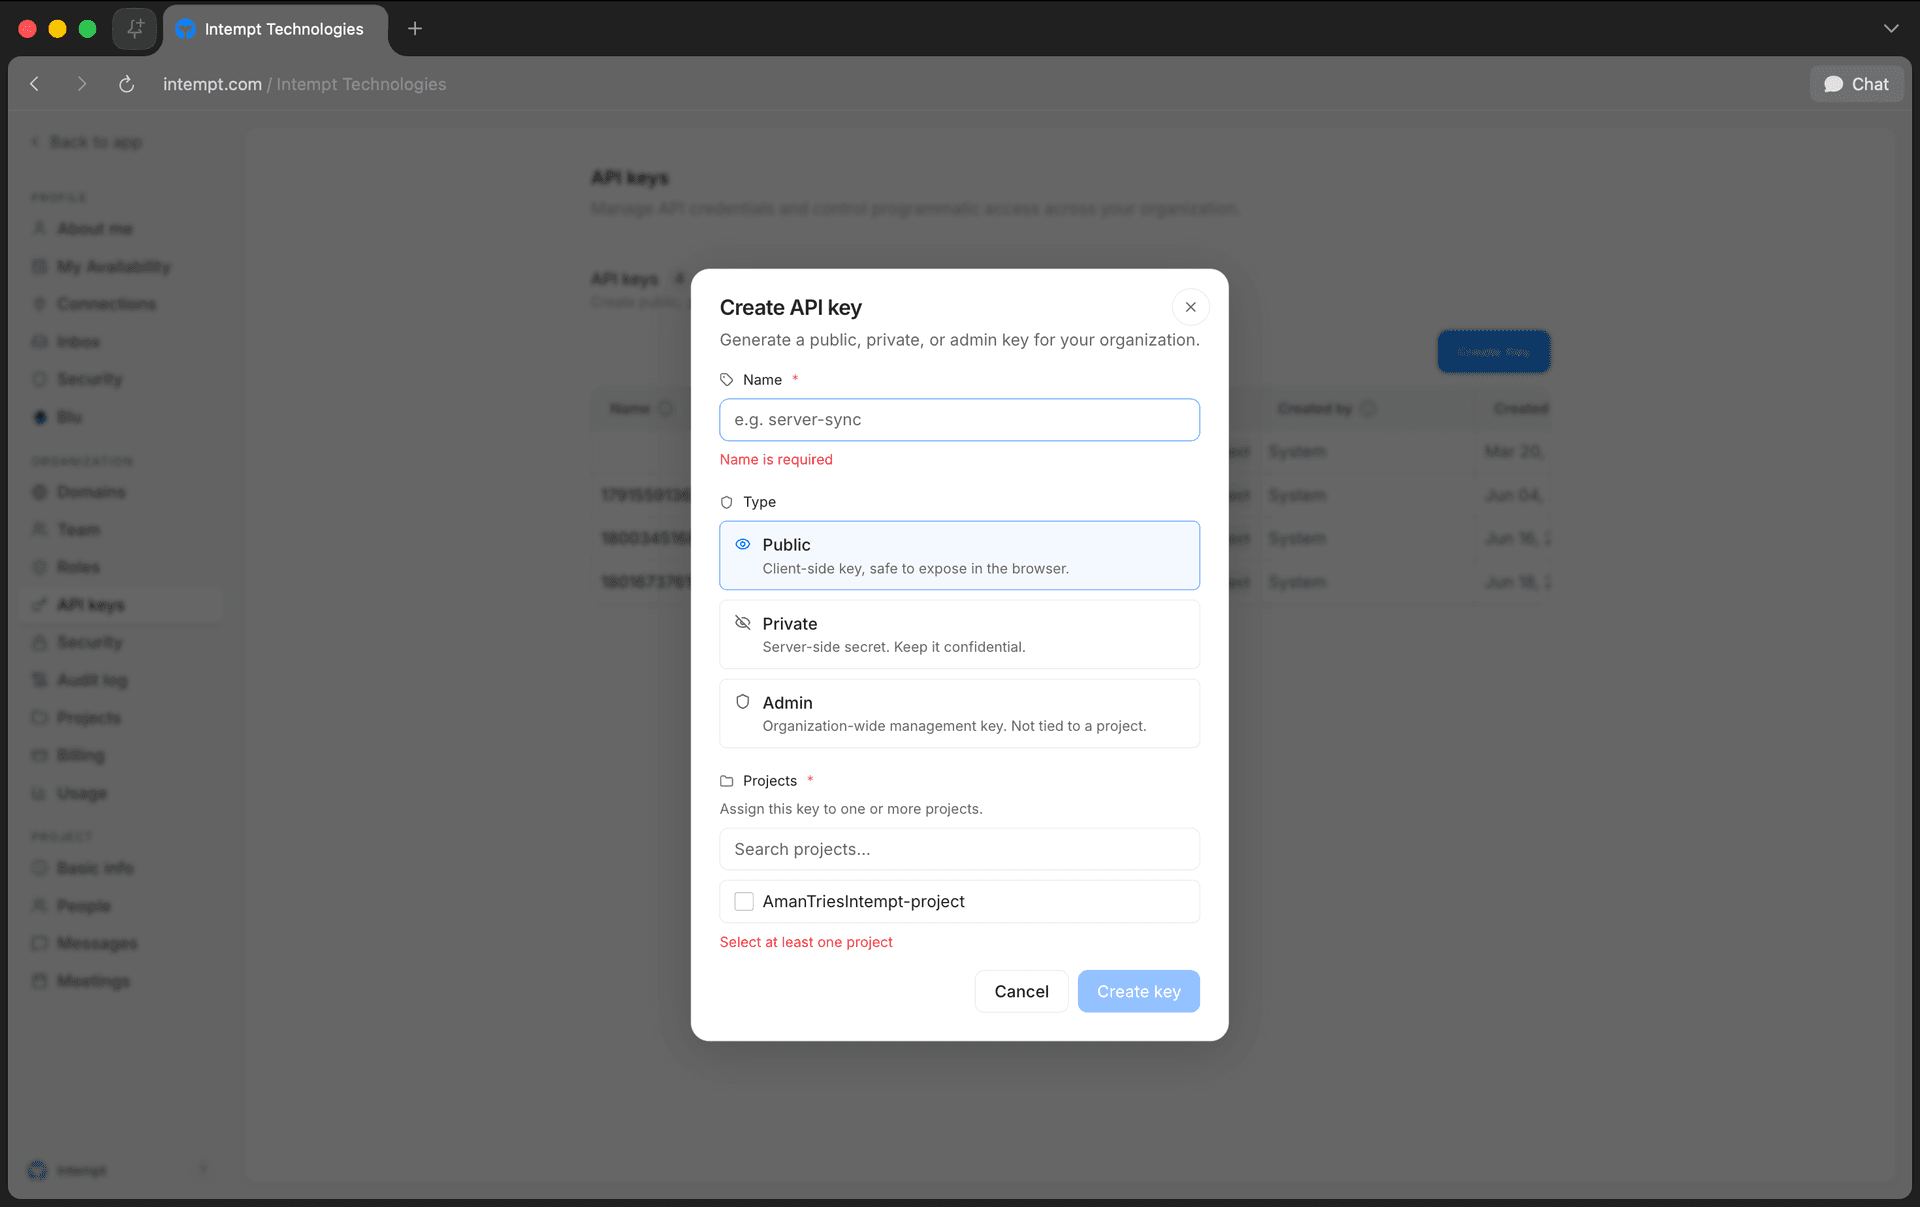
- Go to Settings and open the API keys tab.
- Click Create Key.
- Name the key, choose Public as the type (a public key is a client-side key, safe to expose in the browser), and select the project it applies to.
- Click Create key, then copy the full key. Intempt shows it once and won't display it again in full.
📘 Good to know
Cloud sources like HubSpot, Shopify, and Stripe don't use an Intempt API key. You connect them by authorizing with your account for that service through OAuth instead.
Step 2: Create a source and set up autocapture
Autocapture gets you data like page views, clicks, and form submissions from your site without setting up individual events. It also keeps working automatically as you change your frontend, so restructuring a page doesn't require touching your tracking code.
To set up autocapture:
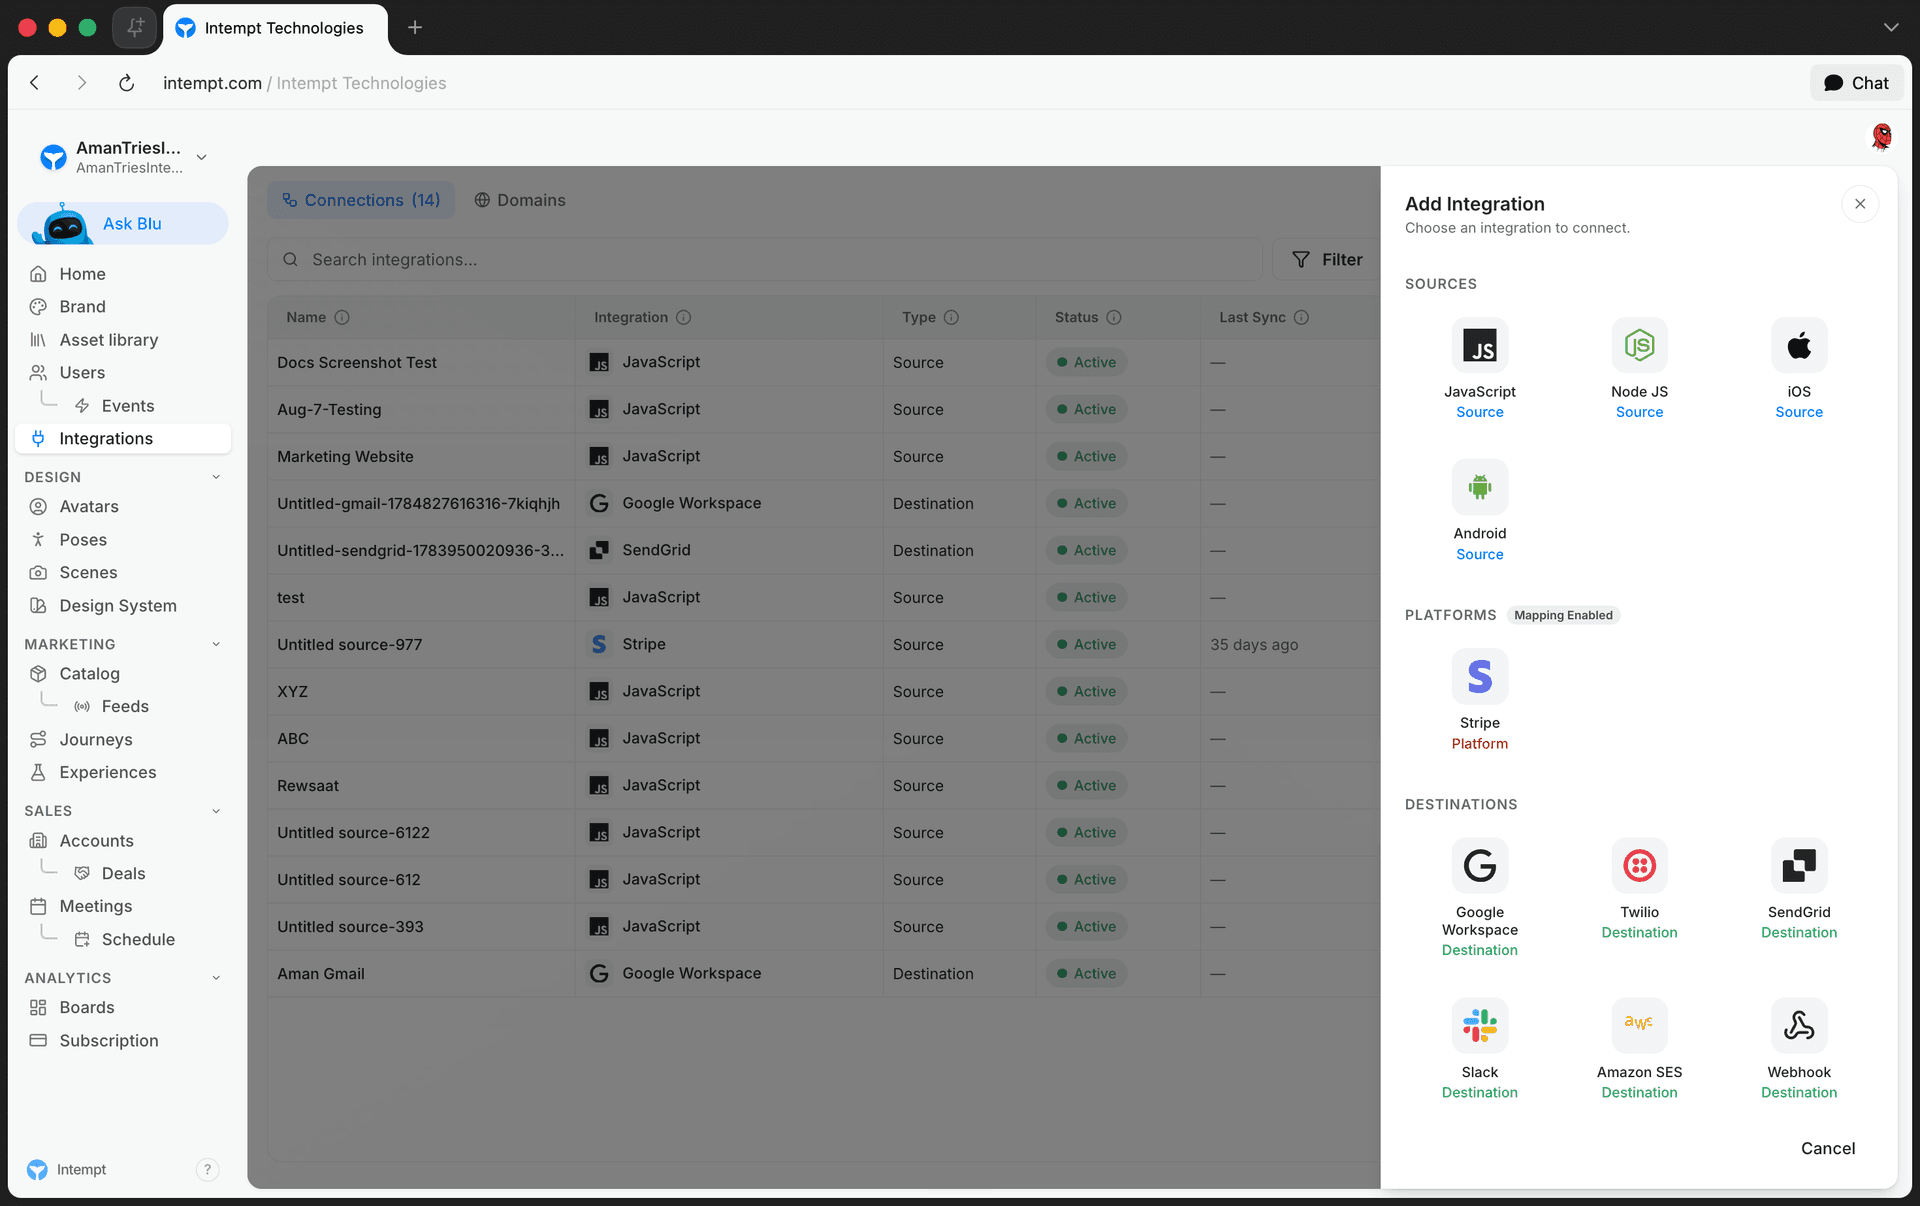
- Go to Integrations and click Add Integration.
- Under Sources, click the JavaScript tile.
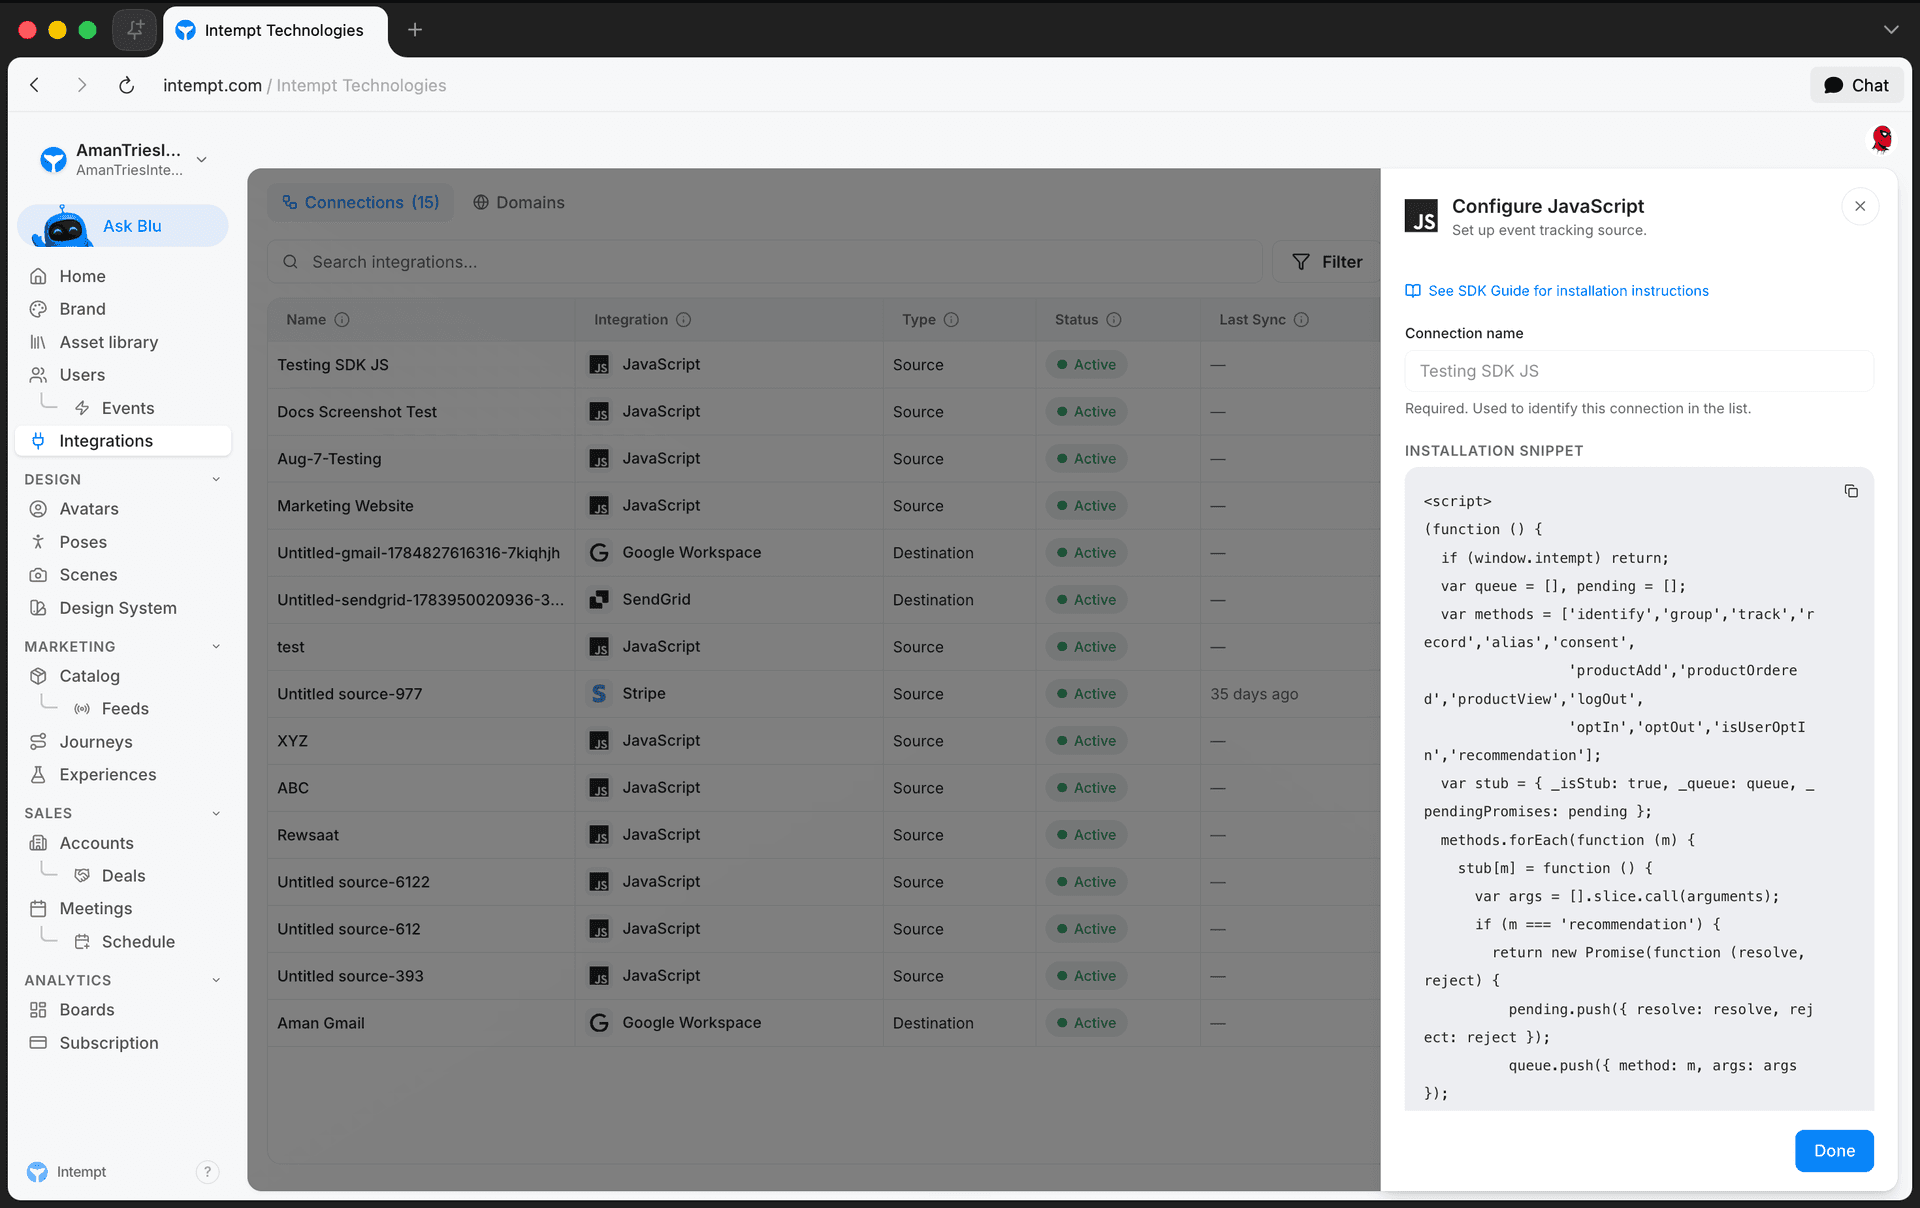
- In the Configure JavaScript panel, enter a connection name and click Proceed. The source is created and the installation snippet appears. Copy it.
📘 Don't miss out
The snippet contains a placeholder, {YOUR_API_KEY}. Replace it with the public key you copied in Step 1 before you paste the snippet anywhere.
- Paste the full snippet into your site's HTML, inside the
<head>tags, on every page (or base template) you want to track.
<script>
(function () {
  if (window.intempt) return;
  var queue = [], pending = [];
  var methods = ['identify','group','track','record','alias','consent',
                 'productAdd','productOrdered','productView','logOut',
                 'optIn','optOut','isUserOptIn','recommendation'];
  var stub = { _isStub: true, _queue: queue, _pendingPromises: pending };
  methods.forEach(function (m) {
    stub[m] = function () {
      var args = [].slice.call(arguments);
      if (m === 'recommendation') {
        return new Promise(function (resolve, reject) {
          pending.push({ resolve: resolve, reject: reject });
          queue.push({ method: m, args: args });
        });
      }
      queue.push({ method: m, args: args });
    };
  });
  window.intempt = stub;
})();
</script>
<script async src="https://cdn.intempt.com/v1/intempt.min.js?organization=your-org&project=your-project&source=web-source&key={YOUR_API_KEY}"></script>- Click Done to close the panel.
Once the snippet is live, autocapture starts sending page views, page exits, sessions, clicks, and form changes and submissions into Intempt automatically.
For the full method reference, including every autocaptured event and how to mask sensitive text with doNotCapture, see the JavaScript SDK reference.
Autocapture's limitations
Autocapture is useful, but it isn't enough on its own for deeper product analytics, for two reasons.
First, autocapture can be overwhelming. In high-volume sites, every click, input change, and submission gets tracked, so without filters and segments already set up, that stream of events is hard to make sense of.
Second, autocapture is general by design. To get the most out of Intempt, use custom events to track exactly the behavior you care about, from a hover on the frontend to a function call on your backend.
Step 3: Set up custom events
Custom events let you capture details from anywhere in your codebase, whether that's a button press on the frontend or a class method call on the backend.
You need the JavaScript snippet from Step 2 installed before custom events will send any data.
To log a custom event, call intempt.record() with an object containing an event title and the data you want to attach:
const recordParams = {
  eventTitle: 'login',
  userId: 'john.doe@example.com',
  userAttributes: {
    loginMethod: 'OAuth',
    attemptCount: 3
  },
  data: {
    ipAddress: '192.168.1.1'
  }
};

intempt.record(recordParams);
Here's a purchase event with an array of items:
const recordParams = {
  eventTitle: 'purchase',
  userId: 'john.doe@example.com',
  data: {
    items: [
      { itemName: 'item 1', price: 20 },
      { itemName: 'item 2', price: 15 }
    ],
    totalPrice: 35,
    isPaid: true,
    timestamp: new Date().getTime()
  }
};

intempt.record(recordParams);
And a sign-up event that reads its values straight from the form fields:
const btn = document.querySelector('#regBtn');
btn.addEventListener('click', () => {
  const firstName = document.querySelector('input[name="customer[first_name]"]').value;
  const lastName = document.querySelector('input[name="customer[last_name]"]').value;
  const email = document.querySelector('input[name="customer[email]"]').value;

  const recordParams = {
    eventTitle: 'signed_up',
    userId: email,
    userAttributes: {
      firstName,
      lastName,
      email
    }
  };

  intempt.record(recordParams);
}, false);
When the button is clicked, the values are read from the input fields and sent to Intempt as userAttributes on the signed_up event.
📘 Good to know
Only eventTitle is required on record(). userId, accountId, userAttributes, accountAttributes, and data are all optional, so add whichever ones are relevant to the event. See the JavaScript SDK reference for the full parameter table and the simpler track() method, which doesn't take user or account context.
Getting custom events right
Once you're sending custom events, refine them so they capture exactly what you need:
- Start from your product goals: what you need to know about users and their behavior.
- Make sure the data is accessible where you're adding the tracking call, writing helper functions if it needs formatting first.
- Confirm the event is firing with the right data before you rely on it for analysis, segmentation, or reports.
Step 4: Identify users
Autocaptured events identify users for you automatically. Custom events require you to call identify() yourself, passing a unique identifier such as an email or user ID.
function loginRequest(user) {
  return authUser(user).then((authorizedUser) => {
    intempt.identify({ userId: user.email });
  });
}
Identifying a user connects any of their previously anonymous events to that same identity, and lets Intempt recognize them across sessions and devices.
Step 5: Create events
A single tracked call doesn't always represent the whole behavior you want to measure. A sign-up, for example, might involve a page view, a form submission, and a button click. Use the event editor to combine autocaptured events, custom events, and page views into a single defined event. Read more in Events.
Where to go next
- JavaScript SDK reference for the full method list, auto-tracking details, and error handling.
- Sources to connect additional sources like iOS, Android, Node.js, or the REST API.
- Events to combine your tracked data into defined events.
- Analytics to start analyzing the data flowing in.
API Overview & Authentication
Base URLs, request format, and the three ways to authenticate with the Intempt API: JWT bearer tokens, API keys, and SCIM bearer tokens.
Validating installation
Confirm a newly connected source, platform, or destination is actually sending data, using the Connections table and Live data feed.