Multi-channel journey setup
A journey isn't limited to one channel. You can add a Send email step and a Send SMS step to the same workflow, then connect them with a Delay or a True/False condition so the journey carries a user from one channel to the other based on timing or behavior.
Overview
A journey isn't limited to one channel. You can add both a Send email step and a Send SMS step to the same workflow, then connect them with a Delay or a True/False condition so the journey carries a user from one channel to the other based on timing or behavior.
This guide covers combining email and SMS in a single journey: following up on a second channel after a wait, and branching users onto a different channel based on a condition.
How it works
Each messaging step in a journey (Send email, Send SMS) is configured on its own: its own destination (the connected sending integration), template, sender details, and consent category. What makes a journey multi-channel is how these steps are connected on the canvas, not a single "channel" setting:
-
Sequence. Connect a Delay step between a Send email step and a Send SMS step so the second channel only fires after a wait. For example, an SMS follow-up 24 hours after an email step.
-
Branch. Connect a True/False condition after the trigger (or after a messaging step) so users who match a condition follow one channel and everyone else follows another.
Every messaging step in the journey still follows the journey's own deliverability settings. Daily limits, sending windows, and timezone rules apply across the whole journey, not per channel.
📘 Good to know
This guide uses email and SMS. A Push Notification step is also in the step picker and connects the same way; see Journey blocks. Slack steps are not available yet.
Getting started
-
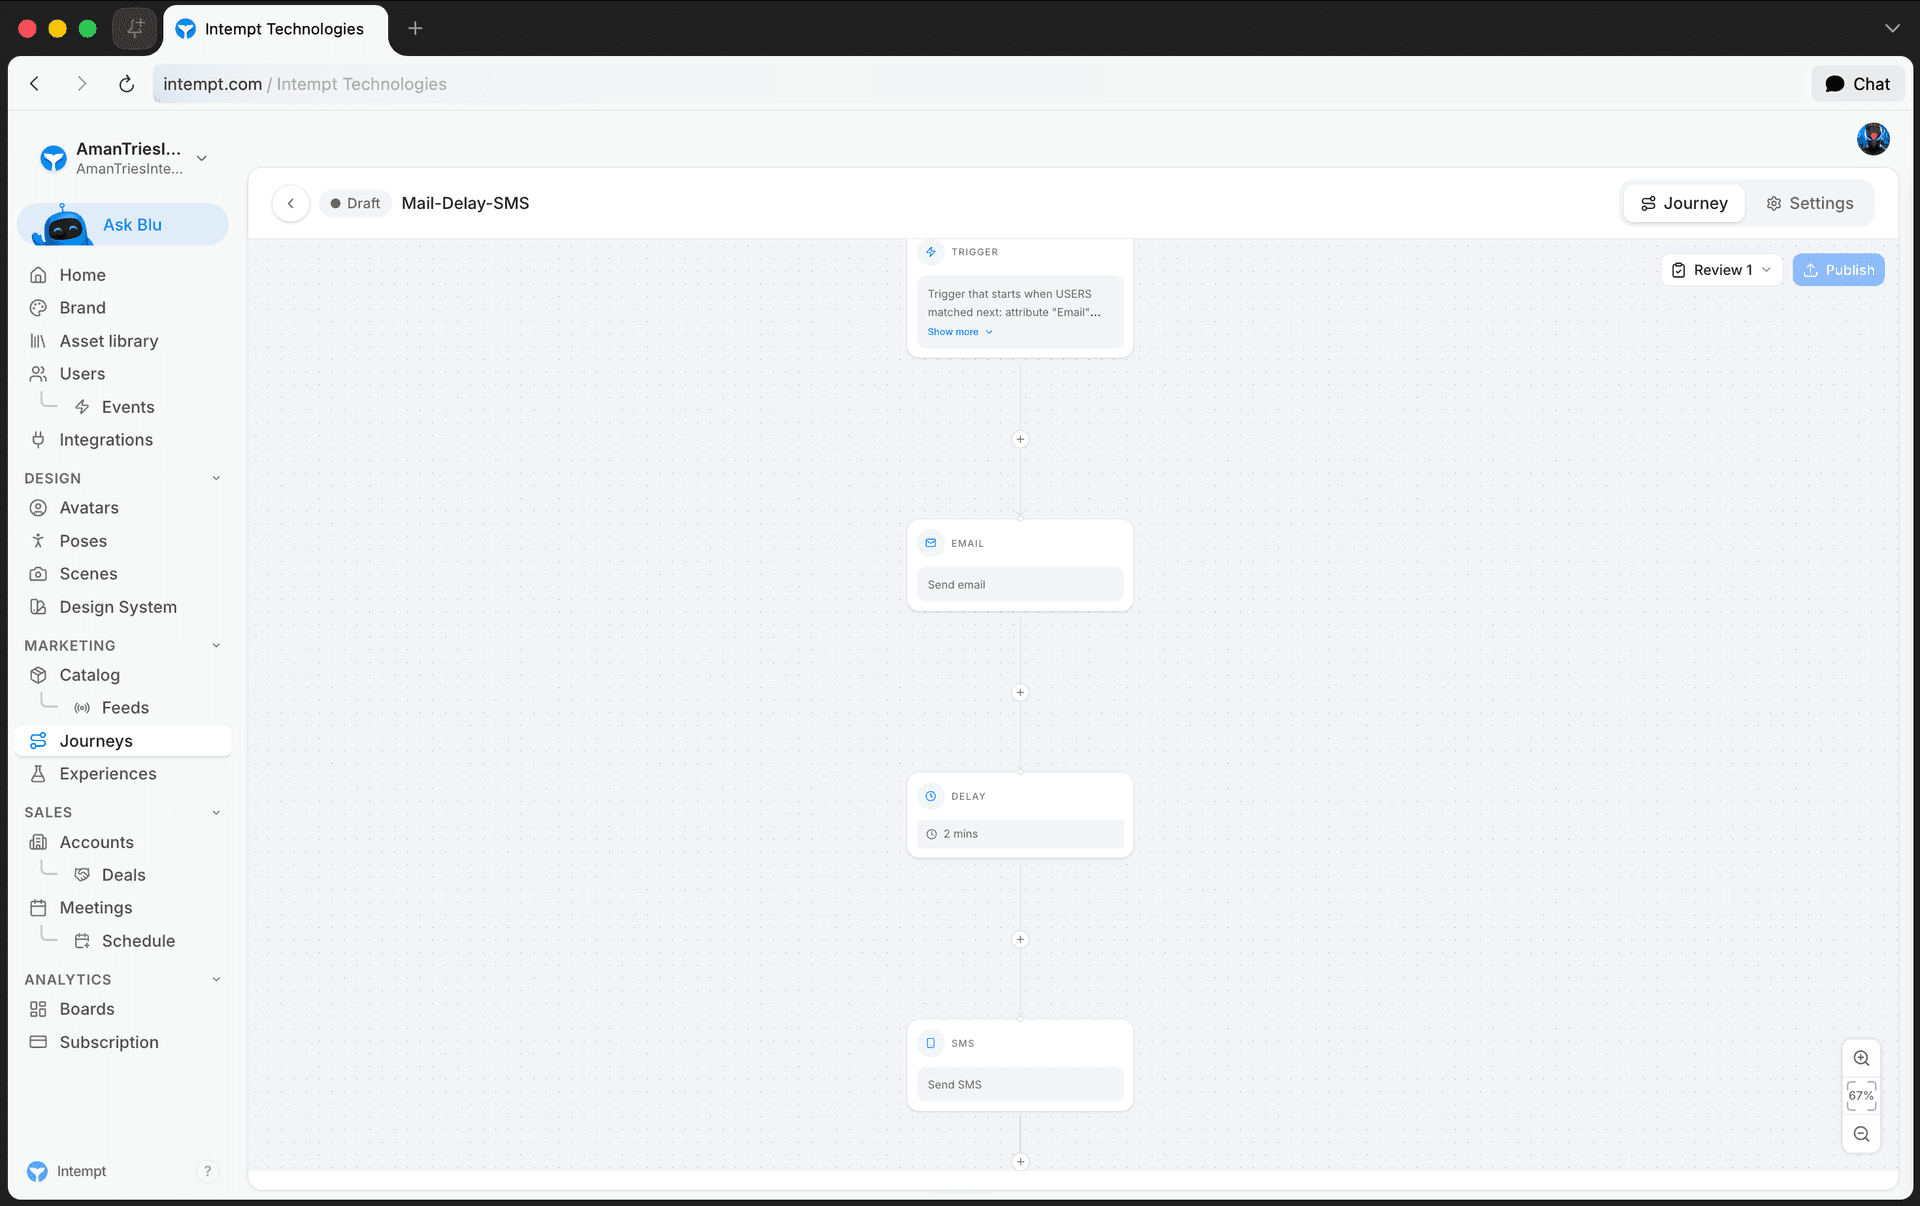
Go to Journeys and open the journey you want to edit, or create a new one.
-
Click the + on the connector coming from the trigger and choose Email under Message to add a Send email step.
-
Configure the step: select a destination (this is where you choose SendGrid or Gmail), pick a template, and set the sender details, including from name, from email, and reply-to.
-
Click the + below that step, add a Delay step, and set how long to wait. For example, 1 day.
-
Click the + after the delay and choose Send SMS under Message. Select a destination and template. The sender ID comes from your connected Twilio number, not a field you set per step.
-
Set When to send on each messaging step. Email supports sending automatically on step entry, at a scheduled time, or manually triggered. SMS supports automatically on step entry, or queued as a draft for manual review before it goes out.
-
Set the consent category on each step so email and SMS only send to users who've consented to that communication type.
-
To branch users onto different channels instead of sequencing them, add a True/False condition after the trigger and connect a different messaging step to each path. For example, users with a phone number on file follow the SMS path, and everyone else follows the email path.
-
Open Settings → Deliverability to set the daily limit, sending window, and timezone rules that apply across every channel in the journey.
-
Once the pre-publish checklist is clear, select Publish.
Where to go next
-
Journey blocks: full configuration reference for Send email, Send SMS, and the True/False condition block.
-
Deliverability: sending limits and timing rules that apply across every channel in a journey.
-
Creating a journey: end-to-end walkthrough of building and publishing a journey.
-
Managing a journey: pausing, editing, and stopping a live journey.