
Setting Up Your Pipeline
Configure your deal stages and create your first deal so your team can track revenue opportunities from first contact to close.
Overview
Your pipeline organizes every deal into stages, from first contact to close. Before your team can start tracking revenue opportunities, set up the stages that match how your sales process actually works, each with a probability that reflects how likely a deal at that stage is to close.
How it works
Deal stages are a project-level setting, so every deal created in a project follows the same stage list. Each stage has:
- A name (for example, "Contacted" or "Proposal Sent")
- A probability, from 0% to 100%, that estimates how likely a deal at that stage is to close
- A used in count showing how many current deals sit in that stage
Two probability values are reserved for closing a deal: Won (100%) and Lost (0%). Deals sitting in those stages are what the Deals page's Won deals and Lost deals views filter on.
Getting started
Configure your pipeline stages
- Open the project switcher at the top of the sidebar, then click the settings icon next to your current project to open Project Settings.
- Select the Users tab, then open the Deals sub-tab under Data Model.
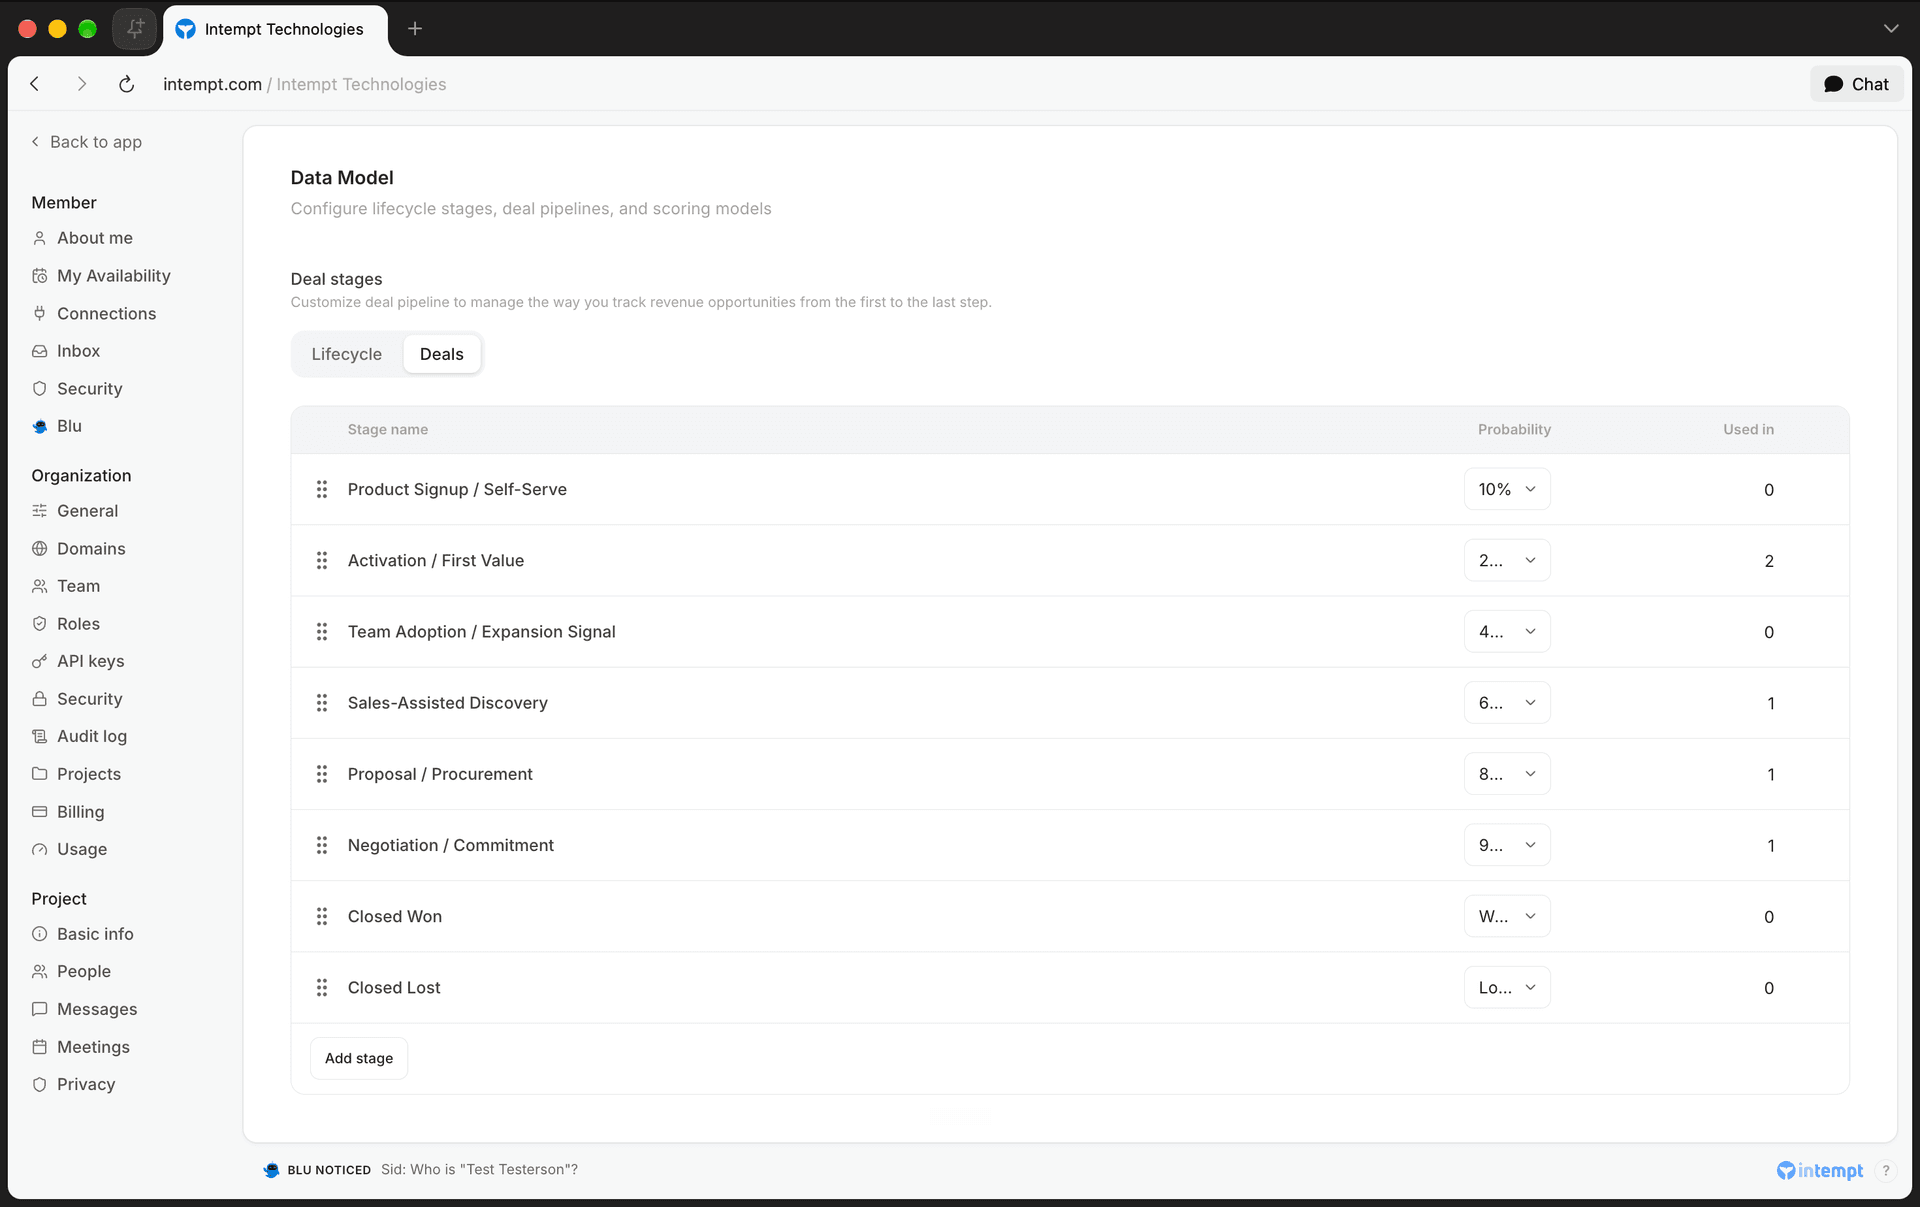
- Add a stage. Click Add stage to append a new stage named "New stage" at 50% probability, then rename it.
- Rename a stage. Hover over a stage name, click the pencil icon, edit the name, and press Enter (or click the checkmark) to save.
- Set the probability. Click the probability dropdown next to a stage and choose a value from 10% to 90%, or Won (100%) / Lost (0%) to make it a closing stage.
- Reorder stages. Drag a stage by its grip handle to change its position in the pipeline.
- Delete a stage. Click the trash icon. If the stage still has deals in it, or it's one of the pipeline's original default stages, the delete option is disabled with a tooltip explaining it's in use. Move any deals out of the stage first, then delete it.
📘 Good to know
Stage changes apply immediately to every deal in the project. There's no separate save step.
Create your first deal
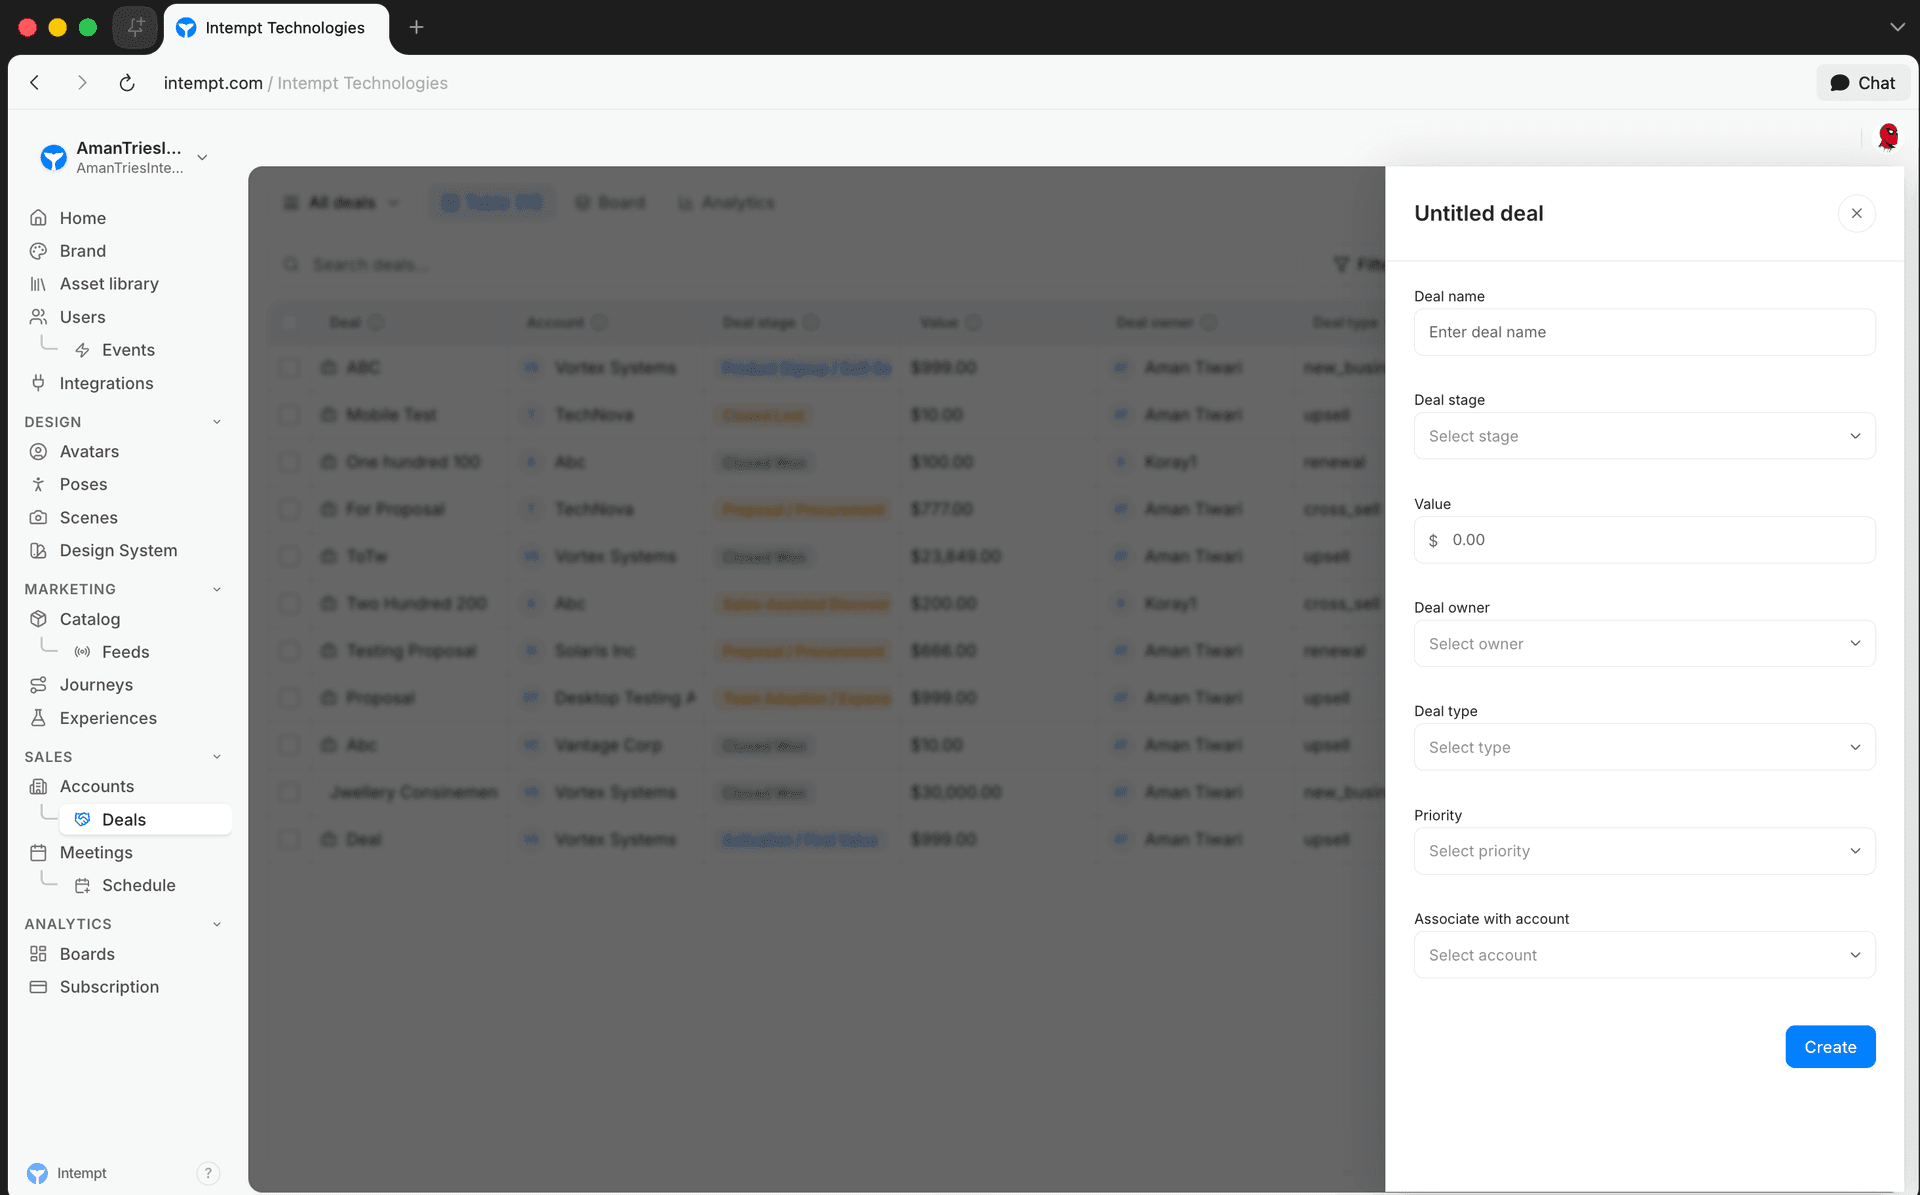
- Go to the Deals page and click Create deal.
-
Fill in the deal fields:
- Deal name – a descriptive name for the opportunity
- Deal stage – one of the stages you configured above
- Value – the deal amount
- Deal owner – a searchable list of project members
- Deal type – New Business, Upsell, Renewal, Cross Sell, or Other
- Priority – Low, Medium, High, or Urgent
- Associate with account – the account this deal belongs to
-
Click Create. The deal appears in whichever stage you selected.
Track deals through the pipeline
The Deals page has three views, switchable from the tabs at the top:
- Table – a sortable, filterable list of every deal, with columns for account, deal stage, value, owner, type, priority, and close date
- Board – a Kanban-style view grouped by stage (or another attribute), so you can drag a deal card between stages as it progresses
- Analytics – deal performance charts and metrics
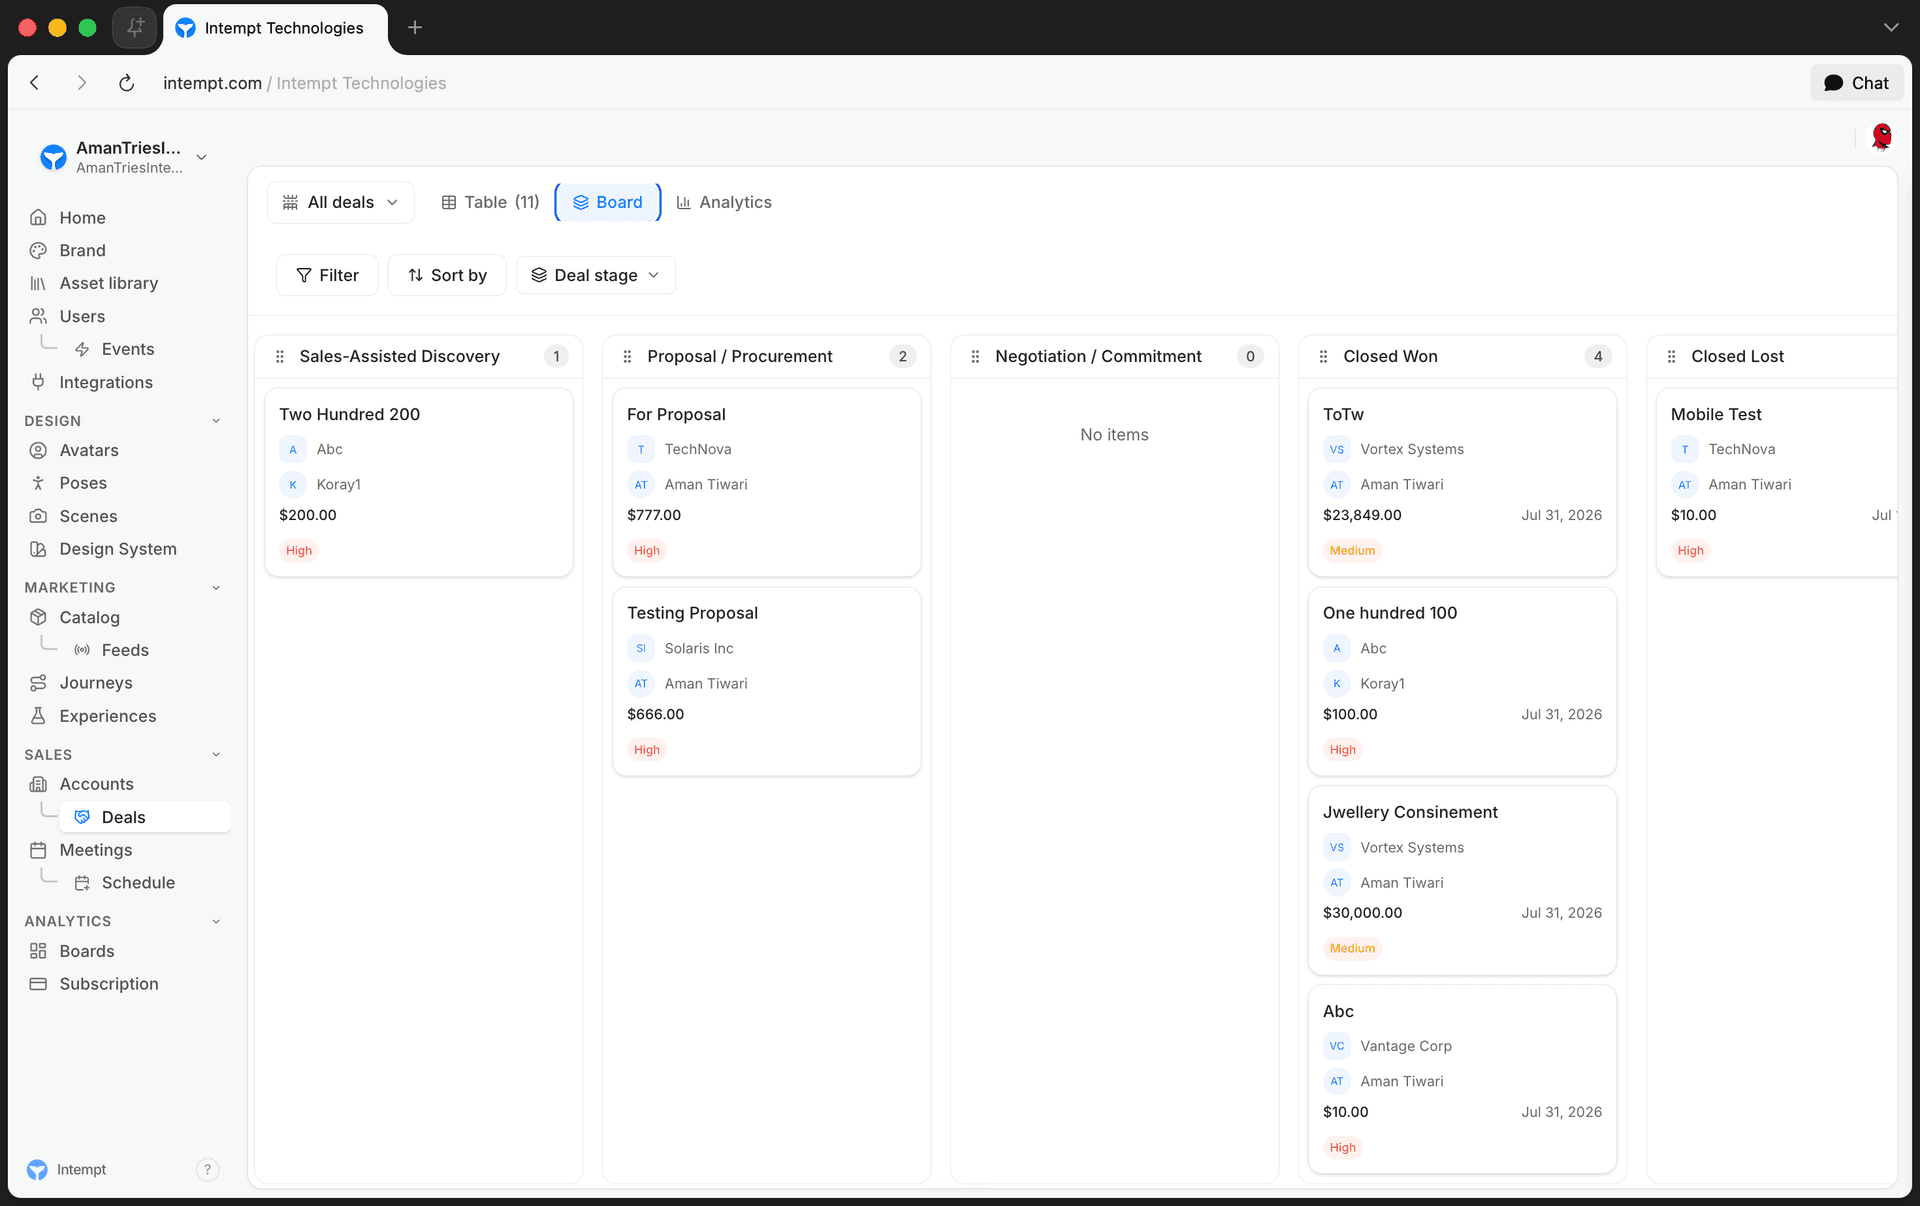
Use the segment selector next to the page title to switch between All deals, Won deals, Lost deals, and Open deals.
Use cases
- New pipeline setup. A new project starts with a default set of stages. Rename them and adjust probabilities to match your actual sales process before your team starts logging deals.
- Multi-stage negotiation tracking. Add intermediate stages like "Proposal Sent" or "Negotiation" so a deal's probability updates as it moves closer to close.
- Separating won and lost outcomes. Keep one stage at 100% and one at 0% so Won deals and Lost deals stay easy to filter and report on.
- Cleaning up an unused stage. After a sales process change, move any deals out of a stage, then delete it.
- Reordering the pipeline. Drag stages to match the order deals actually move through, so the Board view reads left to right the way your team thinks about a deal's progress.
Where to go next
Pipeline Overview
Intempt has no single Pipeline page. Your pipeline is Deals and Accounts working together to track revenue opportunities from first contact to close.
Pipeline Reporting & Forecasting
Use the Deals page's Analytics tab to track value won against forecast, win rate, and pipeline health, filtered by date range and deal owner.