
Brand Enforcement Across Channels
How the Design system, Scene, and Avatar you set in Brand Kit carry into every ad you build in Creative Studio, so the same identity holds across every placement.
Overview
Brand Kit's Identity tab is where your default theme and brand voice live once. Design Systems, Avatars, and Scenes are the libraries built from that identity. Creative Studio, where you build brand ads, pulls directly from those same libraries through its own picker, and a single ad can carry that identity across more than one placement at once. This article covers how the pieces connect: what Identity sets, what the picker in Creative Studio does with it, and how one ad reaches multiple placements without redoing the setup for each one.
How it works
Identity sets the default theme and the brand voice
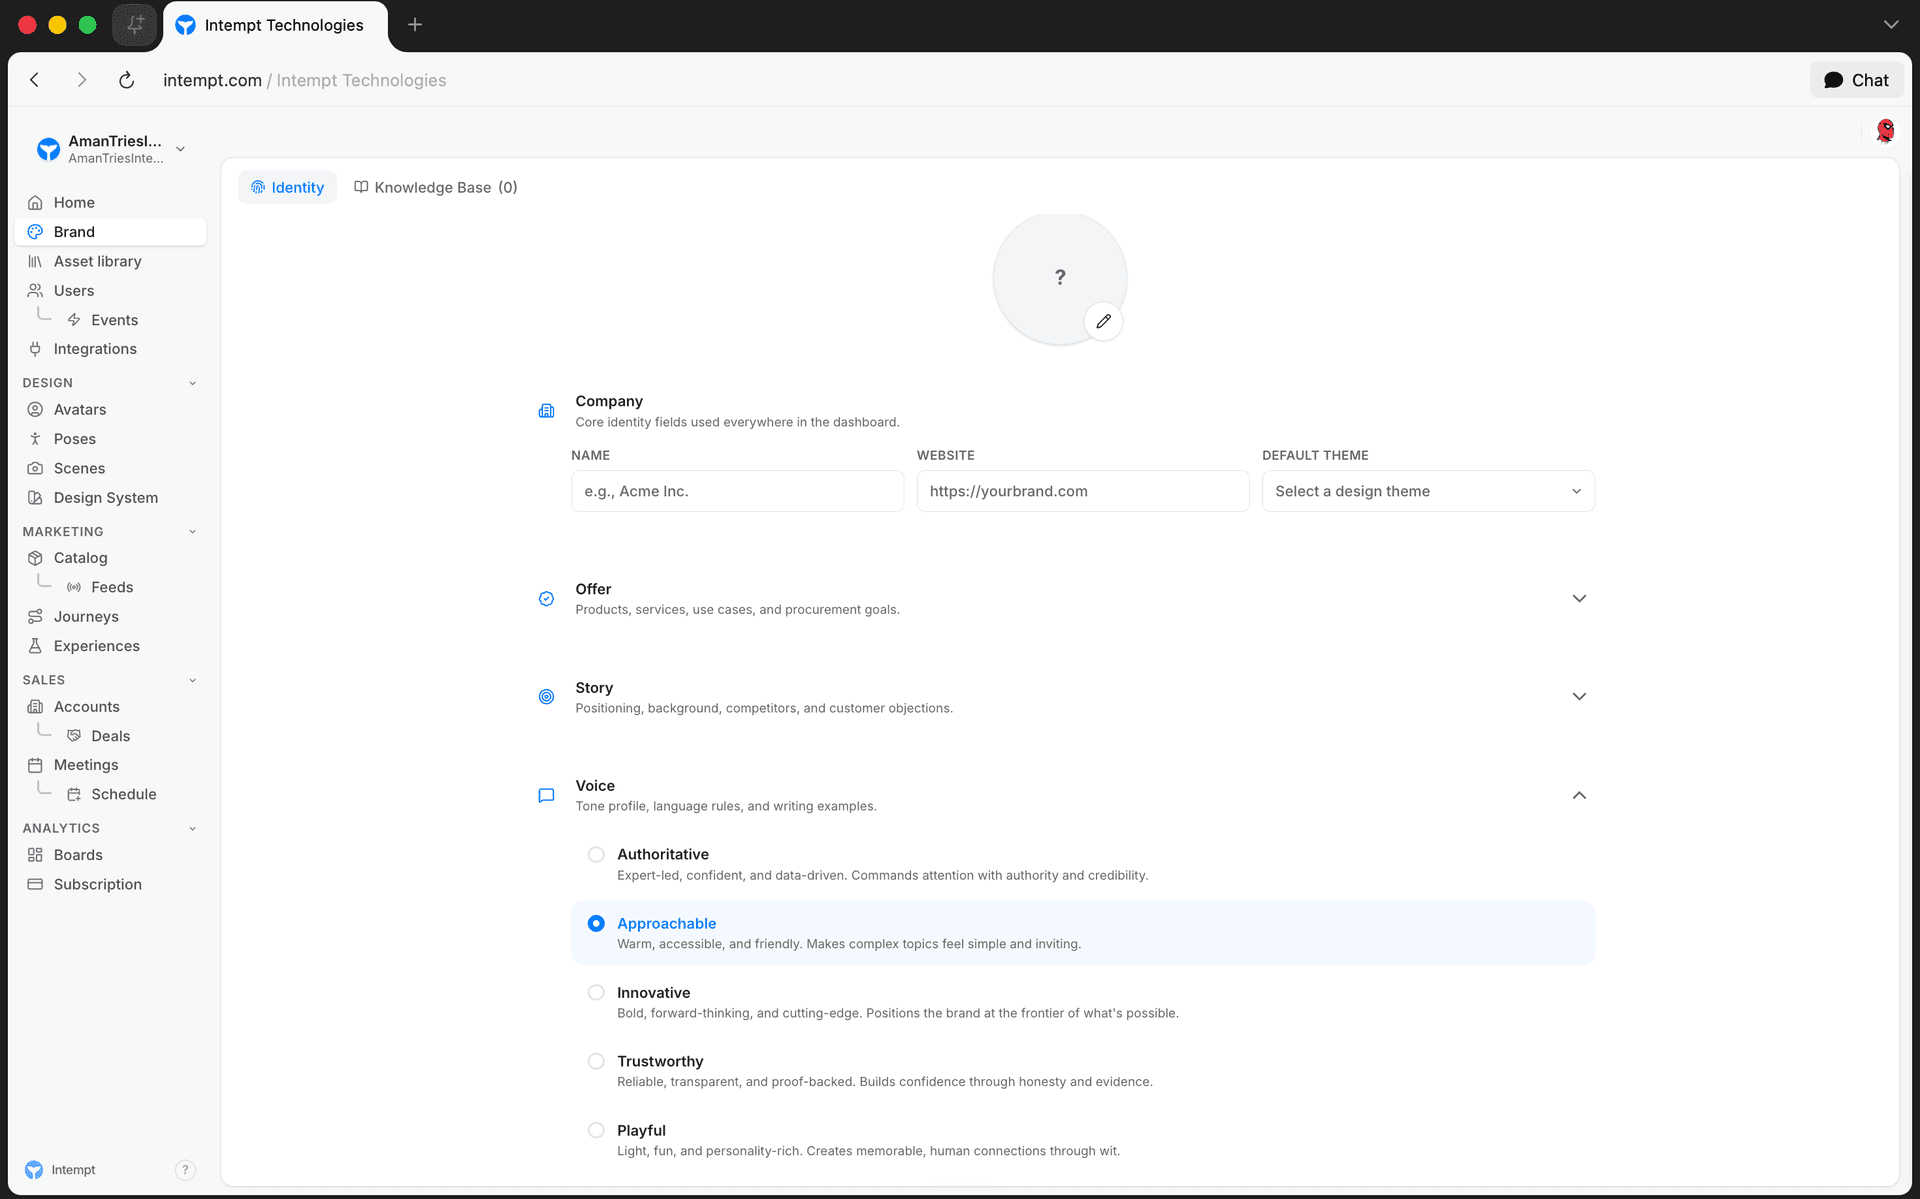
The Company section of the Identity tab holds your logo, name, website, and a Default Theme selector. Opening it shows a small four-color circle next to a dropdown of your project's design systems; picking one sets it as the project's default and updates the circle to match.
The Voice section shows five personalities: Authoritative, Approachable, Innovative, Trustworthy, and Playful, each with a fixed one-line description. Approachable is selected by default until you choose a different one. Below the personalities sit Key Words & Banned Words, Tone & Style, and Brand Examples (an On-Brand Example and an Off-Brand Example), the guardrails that shape how AI-written copy sounds everywhere else in the product. Every field on the Identity tab saves on its own; there's no separate save button.
Creative Studio's picker applies your libraries to an ad
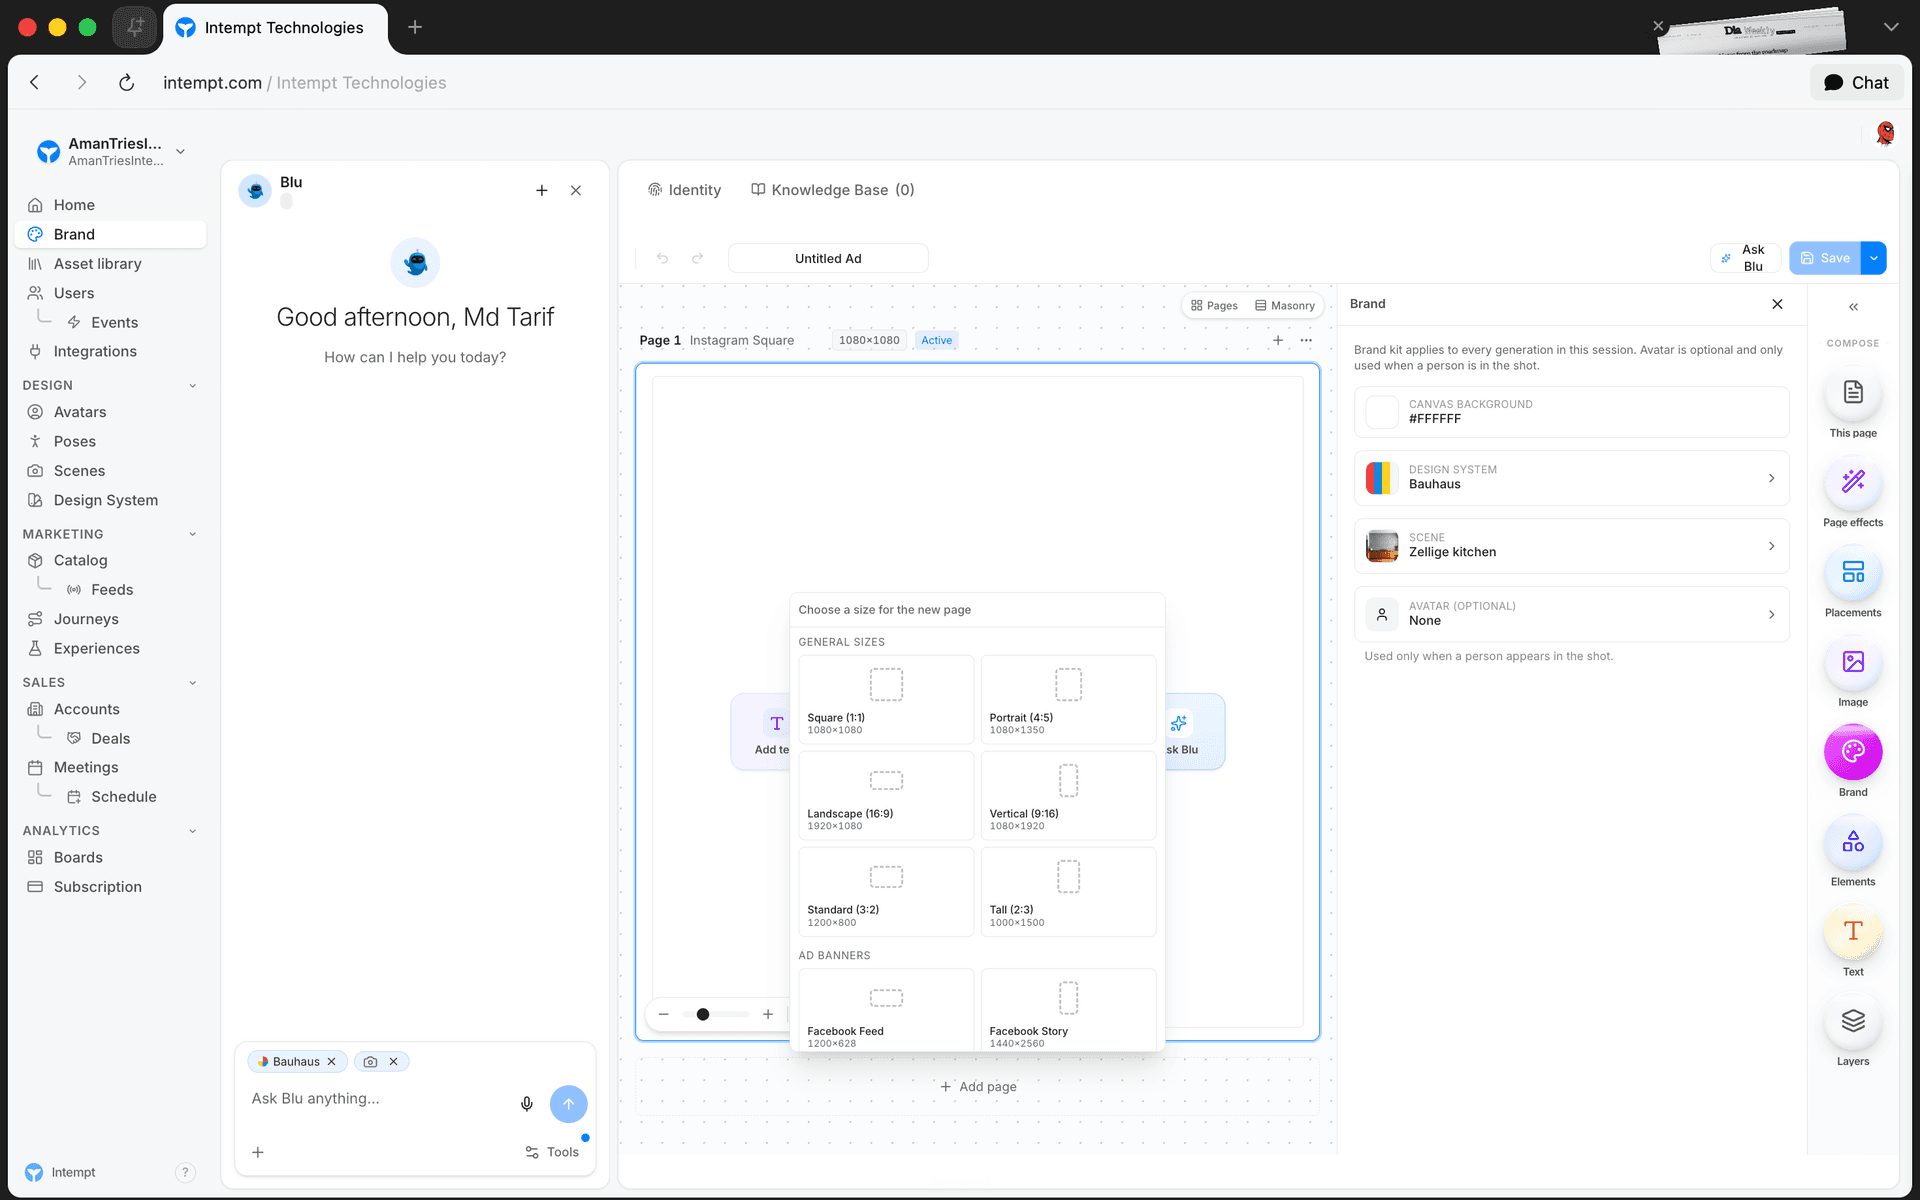
Creative Studio's right-hand panel carries a short note above its pickers: "Brand kit applies to every generation in this session." Below it sit three rows:
- Design system. Defaults to "None" ("Generate without brand colors"), or any design system from your library, shown with its color swatch.
- Scene. Defaults to "None" ("Use the prompt's scene"), or any Scene from your library, shown with its thumbnail.
- Avatar (optional). Defaults to "None" ("Generate without a model"); the panel notes this one is "used only when a person appears in the shot."
Whatever you pick here applies to every generation you make in that ad for the rest of the session, so you set the design system, scene, and avatar once instead of repeating the choice on every image request.
One ad, several placements
A brand ad is a multi-page canvas, and each page is locked to a size you pick when you add it. Adding a page opens a dialog titled "Choose a size for the new page," with presets grouped into General Sizes (aspect ratios like Square, Portrait, Landscape, and Vertical), Ad Banners (network-specific sizes like Facebook Feed at 1200×628 and Facebook Story at 1440×2560), and Email Banners, each shown with its exact pixel dimensions. Because the design system, scene, and avatar you've picked apply across the whole ad, adding a second or third page for a different size doesn't mean re-selecting any of them. The same theme, scene, and character carry to every page.
Getting started
- Open Brand Kit and go to the Identity tab.
- In the Company section, set your logo, name, website, and Default Theme.
- In the Voice section, pick a personality, then fill in Key Words & Banned Words, Tone & Style, and Brand Examples. Both sections autosave.
- Build out the specific Design Systems, Scenes, and Avatars your ads should use. See Generating Brand Assets.
- Open Creative Studio and start or edit a brand ad. In the right-hand panel, pick the Design system, Scene, and Avatar the ad should use.
- Click Add page for each size you're targeting, and pick it from the General Sizes, Ad Banners, or Email Banners list. The design system, scene, and avatar you already picked carry to the new page automatically.
Use cases
- Launching one ad across several sizes. Add a page per size (Square, Facebook Feed, Facebook Story) instead of building a separate ad for each network size.
- Keeping a campaign's character consistent. Pick the same Avatar for an ad's whole session so the same face shows up in every generation, regardless of which page or placement it lands on.
- Switching a campaign's whole look at once. Change which Design system an ad references instead of re-picking colors on every layer by hand.
- Setting the voice before anyone writes copy. Fill in Key Words & Banned Words and Brand Examples before a team starts drafting ad copy, so AI-generated and human-written copy start from the same guardrails.
- Generating without a model. Leave Avatar set to "None" for product-only shots, since it's meant to apply only when a person is in the frame.
- Browsing every available size before adding a page. Open the size picker to see the full General Sizes, Ad Banners, and Email Banners list before picking one.
Where to go next
Logo & Asset Management
Upload or change your company logo and pick your project's default design theme, from Brand Kit's Identity tab Company section.
Avatars Overview
Avatars is Intempt's AI brand-character library, where you browse built-in presets and your own custom characters, then generate identity-consistent images, voice, and renders for each one.