
Using AI Assist in Studio
How to describe what you want to Blu when creating a new asset, generating an image, and fixing a flagged email in Studio.
Overview
In Studio, Blu is how you start almost everything. Instead of opening a blank editor, you describe what you want in chat and Blu produces a first draft to work from. This article walks through the three places you'll use it day to day: starting a new asset, generating and editing an image, and fixing an email that failed its preflight checks.
How it works
Starting a new asset with a description
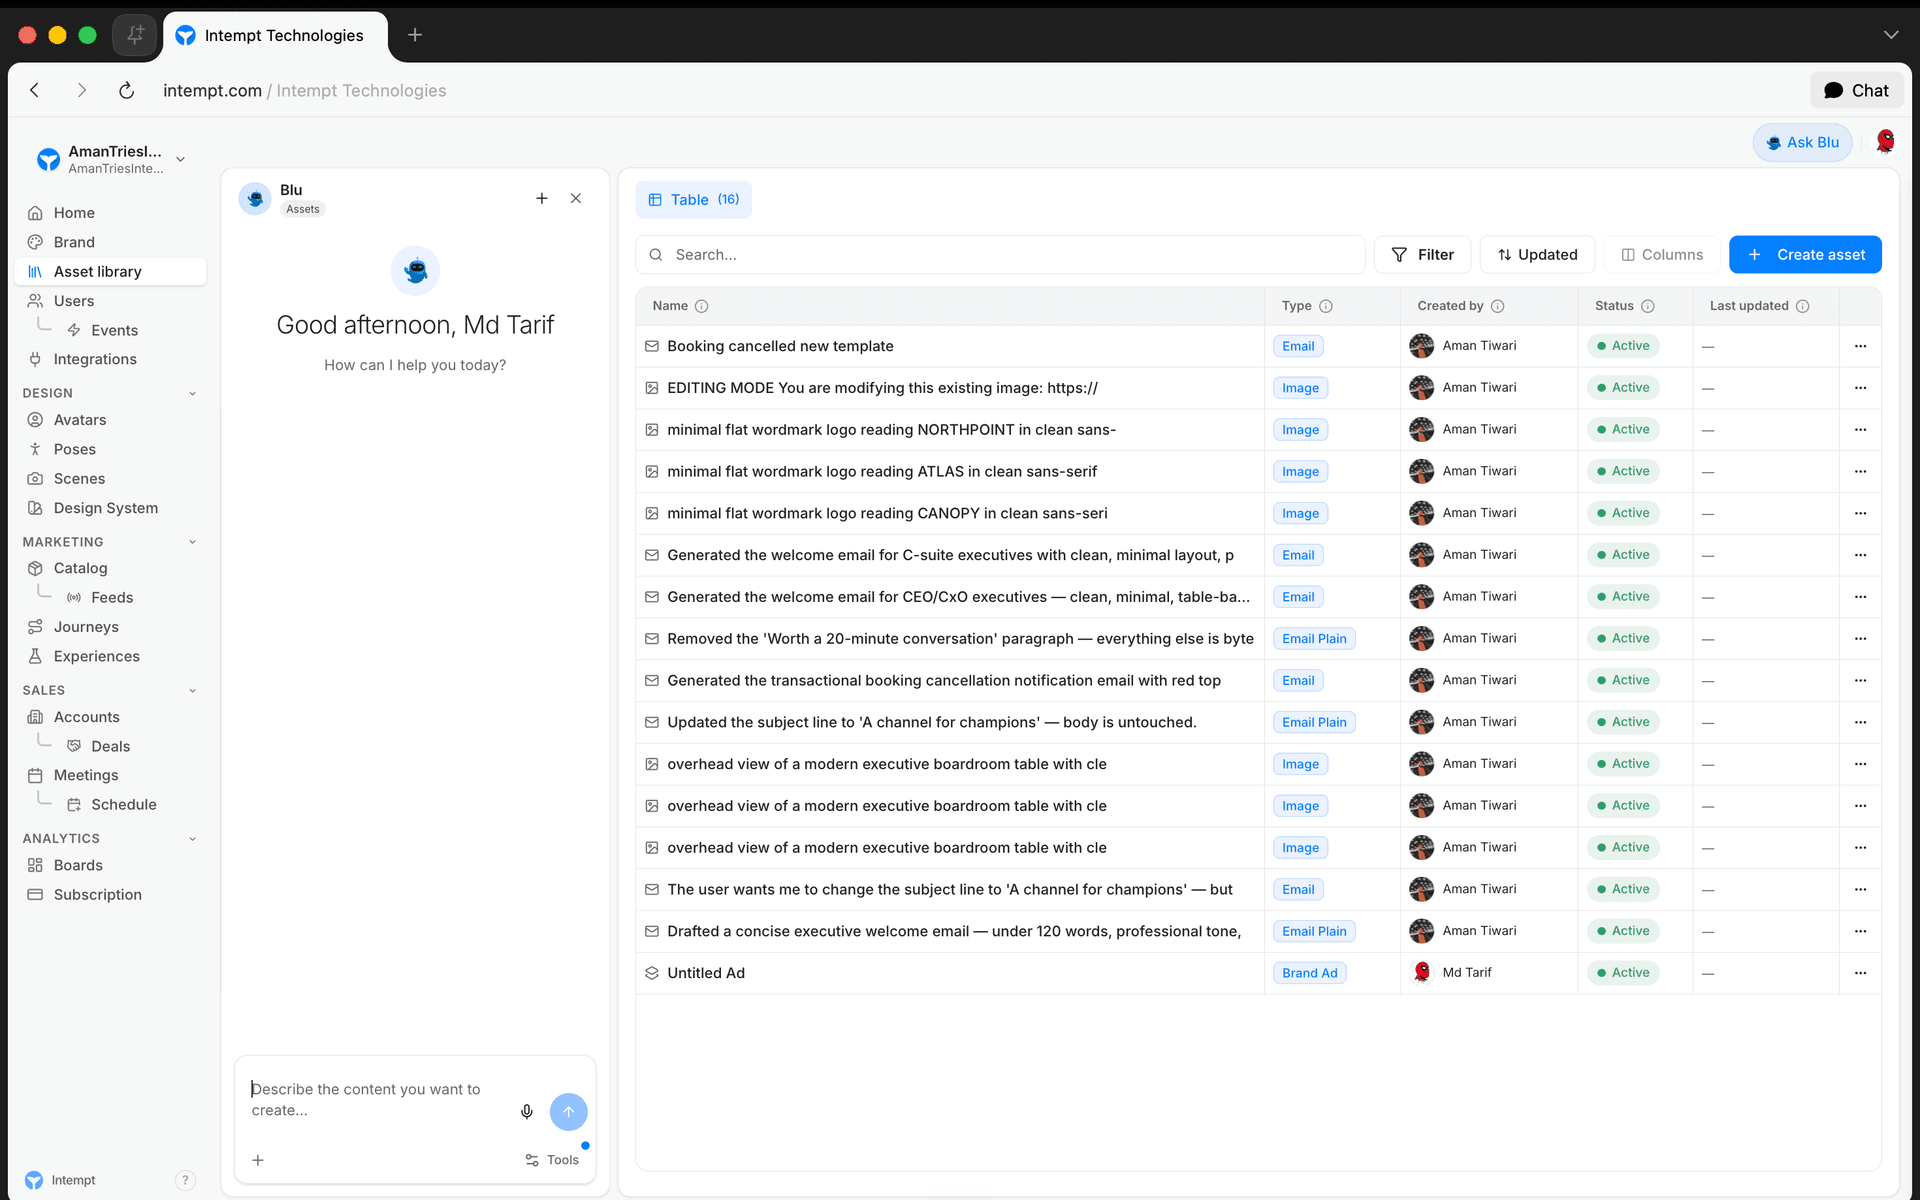
Click Create asset and pick a type. This opens Blu's chat panel already scoped to that content type, so you don't pick a type again inside the chat. Describe what you want in the message box and send it. A loading indicator with a message specific to that content type (for images, "Generating your image…") shows while Blu works, and the editor for that content type opens automatically once a draft exists.
📘 Good to know
This applies to all eight of Studio's launchable types: Image, Email, Email plain, Page, SMS, Push, Slack, and Text.
Generating and refining an image with Blu
Choosing Image opens Image Studio. Its tool rail includes an Image tool: click it, type what you want in the Describe the image box, and click Generate image. The result lands on the canvas.
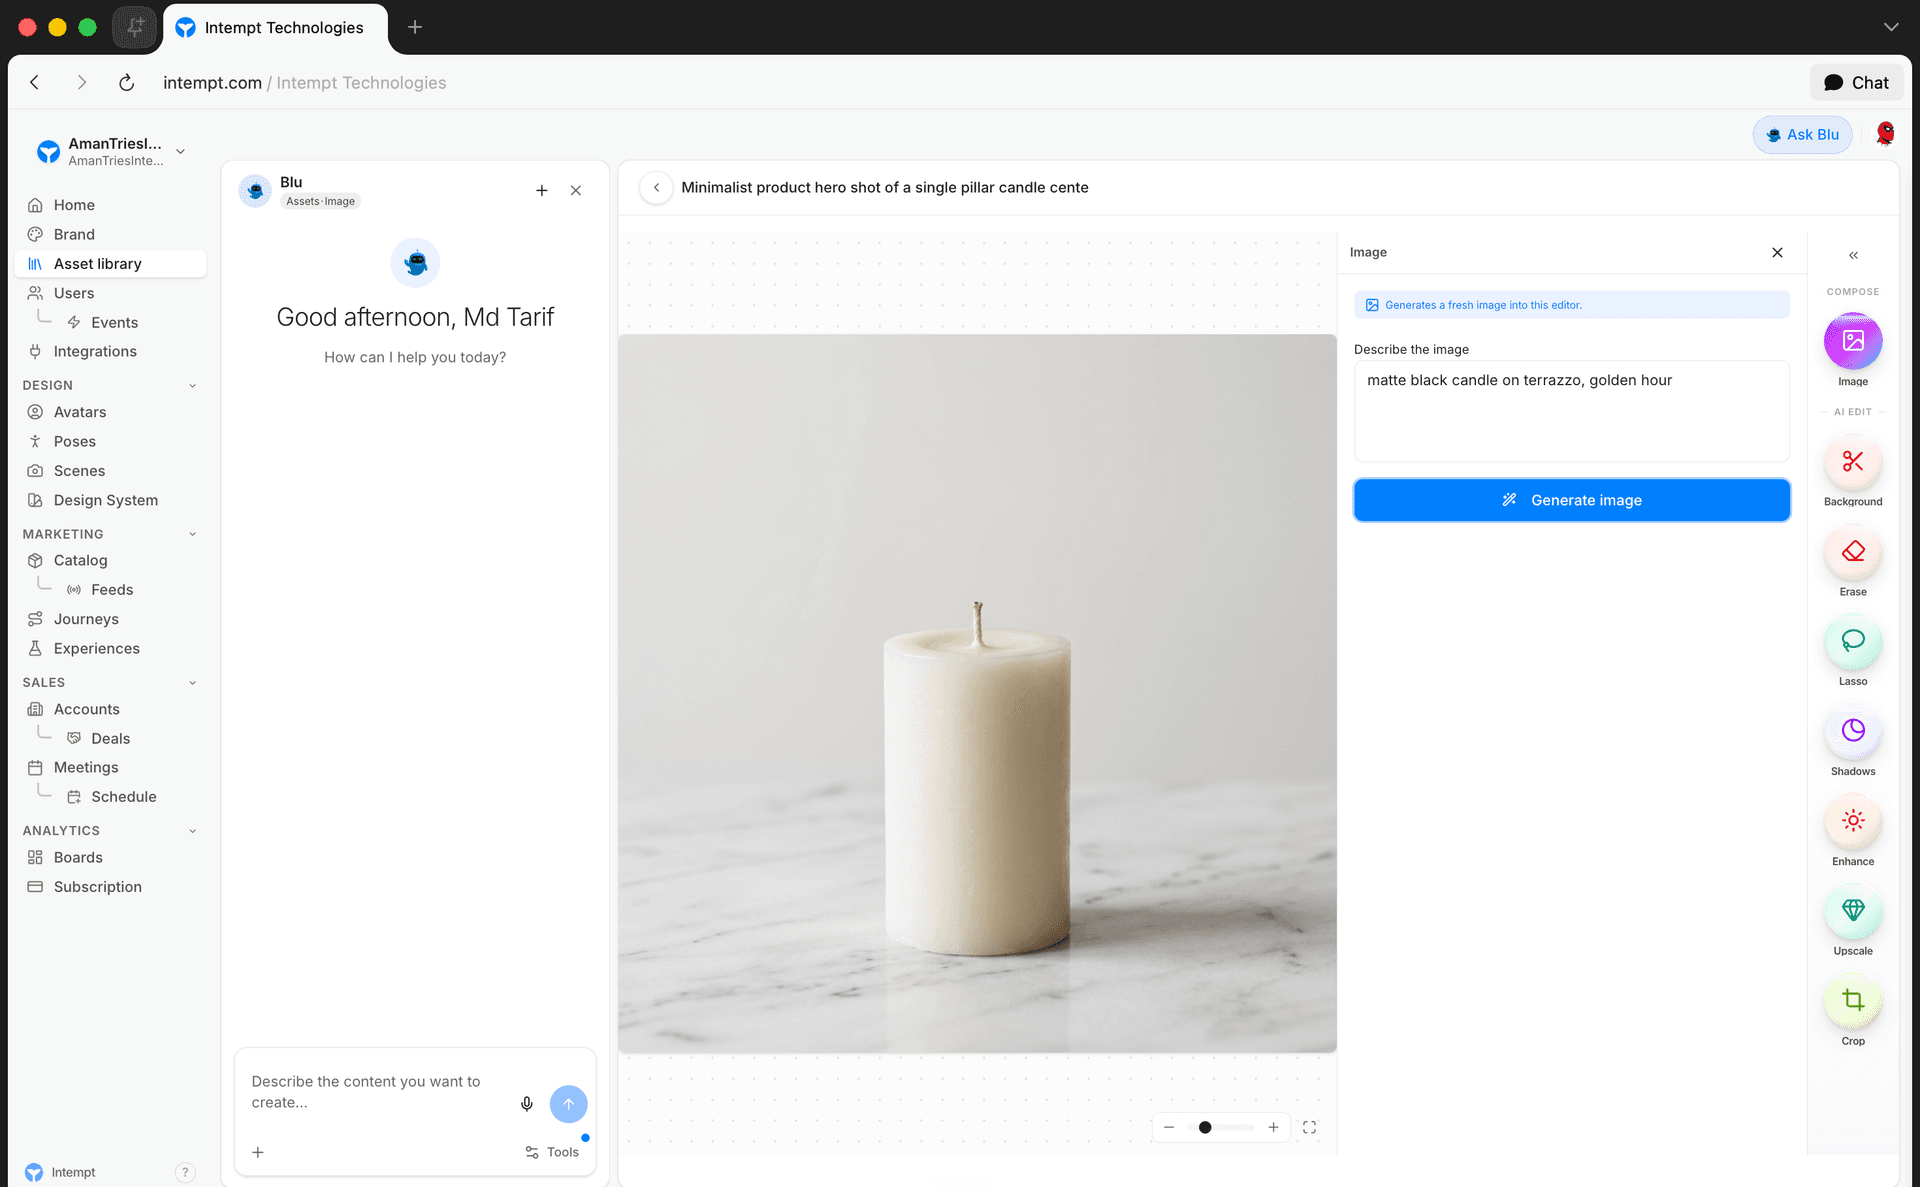
Once an image exists, the rest of the tool rail keeps editing it with Blu instead of a manual photo editor:
- Background removes, replaces, or blurs the background.
- Erase removes whatever you paint over, using a fill prompt to describe what should appear instead.
- Lasso selects a region and edits just that area from a prompt.
- Shadows applies a drop, contact, or flat shadow (or lets Blu auto-pick one), with an adjustable intensity.
- Enhance sharpens the image, with a content-type hint (general, people, product, text) and a strength setting.
- Upscale increases resolution by 2x or 4x.
- Crop crops, resizes, or expands the canvas, with an AI fill for any expanded area.
A chat panel stays docked and pinned to the image you're working on, so you can also type a change request directly instead of reaching for a specific tool. The canvas updates once Blu's response is ready.
Fixing an email with Blu
Open an HTML email in the editor and click Preflight. The dialog checks the email across seven sections (Inbox preview, Device previews, CSS Compatibility, Link validator, Grammar & content, Deliverability, and Visual design) and shows a Ship, Hold, or Reject badge based on what it finds.
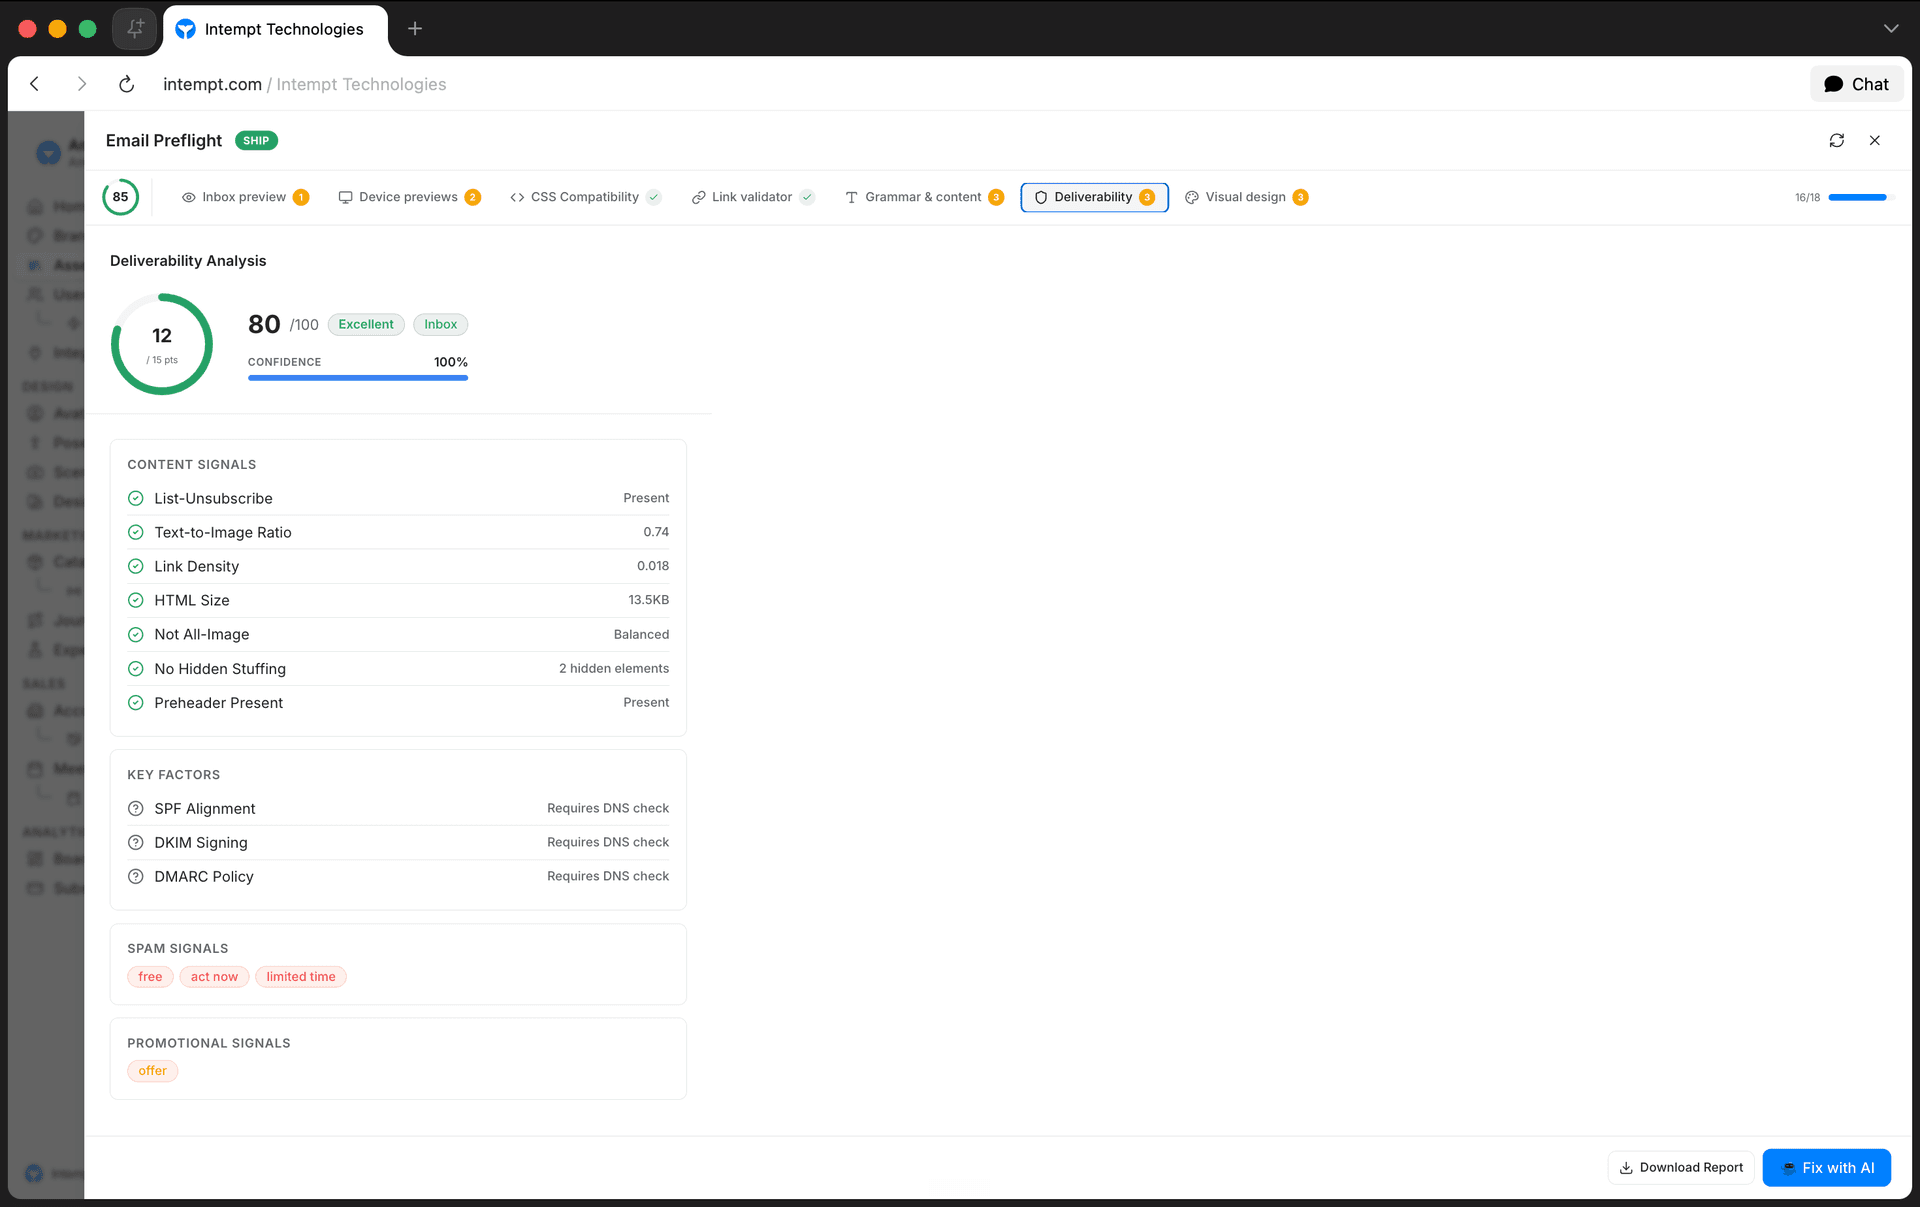
Click Fix with AI in the footer. This closes the preflight dialog and opens Blu's chat with a fix prompt already typed into the message box, built from the current report. Nothing sends automatically. Review the prompt, edit it if you want, and send it yourself.
📘 Good to know
Fix with AI is always visible in the footer, but it does nothing until a preflight report exists. If you haven't run a check yet, click the refresh icon in the dialog first; use it again to re-run the checks against your latest edits before asking for another fix.
Getting started
Create something new
- In Studio, click Create asset and pick a type.
- Blu's chat opens, already scoped to that type.
- Describe what you want and send the message.
- Wait for the loading indicator to finish; the editor opens with Blu's draft loaded.
Generate and edit an image
- Start a new Image asset, or open an existing one, to land in Image Studio.
- Click the Image tool, describe the image, and click Generate image.
- Use Background, Erase, Lasso, Shadows, Enhance, Upscale, or Crop to keep editing the result, or type a request into the docked chat panel.
Fix a flagged email
- With an HTML email open, click Preflight.
- Check the gate badge and review any flagged sections.
- Click Fix with AI.
- Review the fix prompt Blu has typed into the chat, then send it.
Use cases
- Starting an SMS from a one-line description instead of typing the message into a blank field yourself.
- Generating a product image from a description rather than sourcing or shooting one.
- Swapping a busy background for a plain one with the Background tool, without regenerating the whole image.
- Removing an unwanted object from a generated image with Erase, instead of starting over.
- Editing just one area of an image with Lasso when the rest of it is already right.
- Sharpening or upscaling an image before it goes into a campaign, using Enhance or Upscale.
- Catching deliverability or rendering issues by running Preflight before sending an HTML email.
- Fixing a Hold or Reject result with Fix with AI instead of resolving every flagged issue by hand.
Where to go next
Template Library Reference
Field, content-type, action, and filter reference for Studio's Asset library, the shared template library every Journey message step pulls from.
Brand Kit Overview
Brand Kit stores your company identity and knowledge sources in one place: the brand context Blu draws on across the product.