
Viewing User Accounts on Desktop
Browse, search, and open the CRM accounts in your project, then read their Overview, Activity, Users, and Deals tabs from the Intempt desktop app.
Overview
An account in Intempt is a CRM company record: the business a set of your contacts and deals belong to. It's not a login or billing account. There's no plan, seat, or credit field on it anywhere; it's the company-side of the same CRM graph your Users and Deals live in.
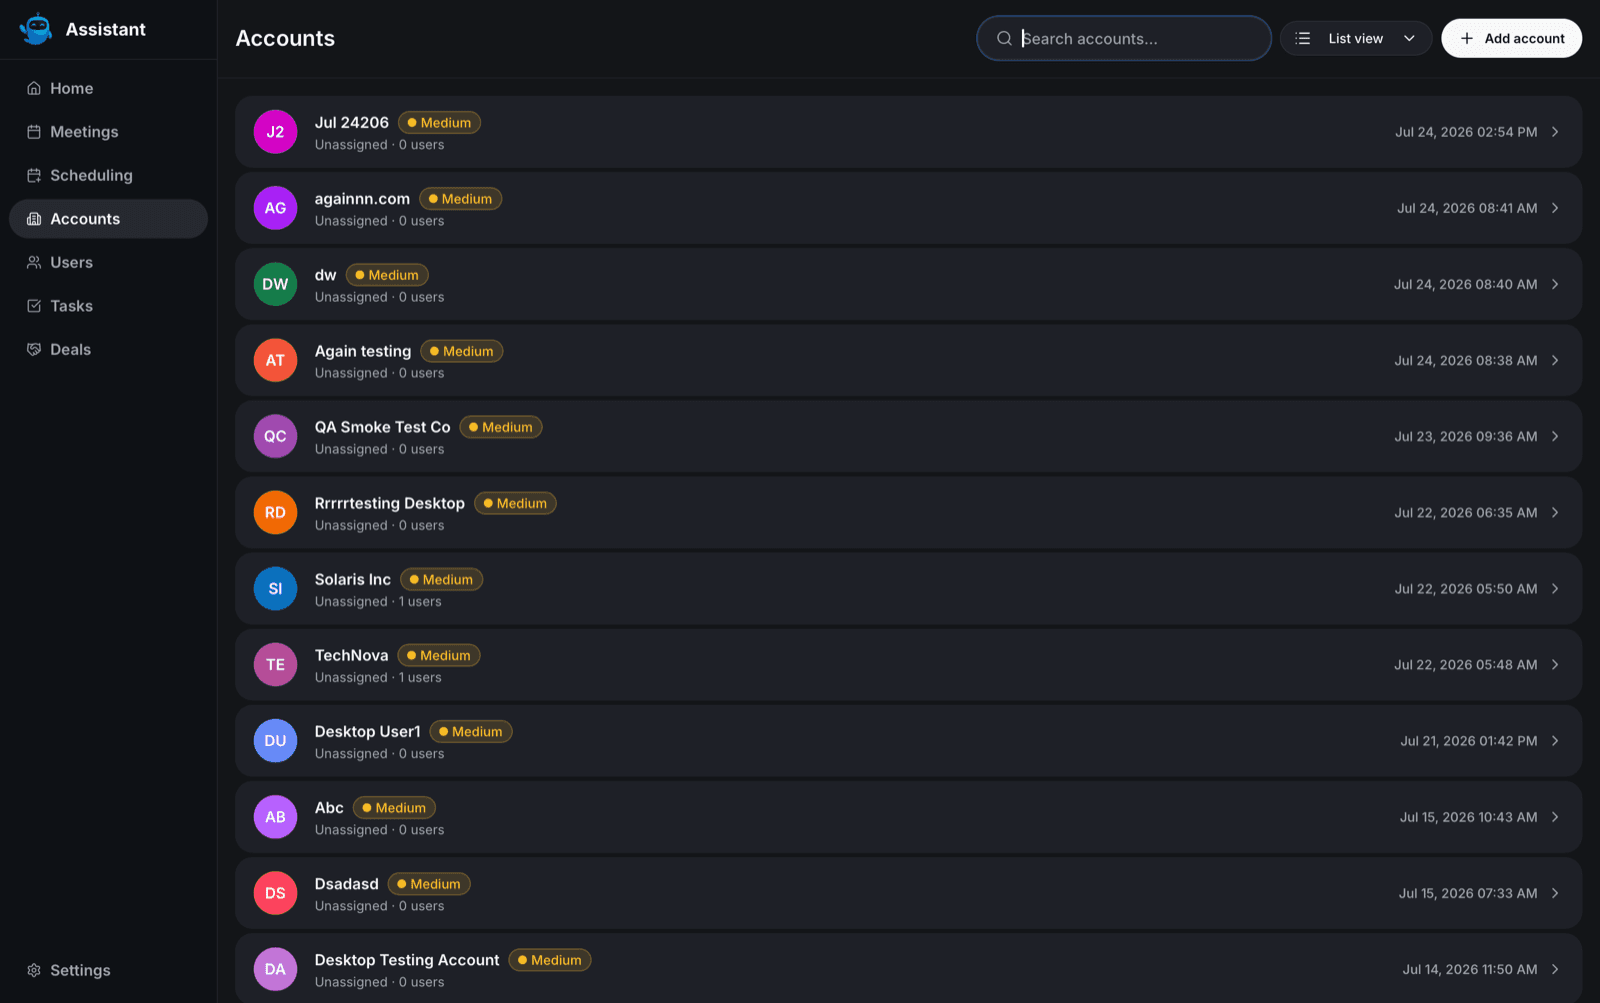
From the sidebar, click Accounts to open the list. This guide covers browsing and searching that list, creating an account, and reading the four tabs on an account's detail page.
Browsing accounts
The list loads with a skeleton placeholder, then shows your accounts in List view by default. A dropdown next to the search bar switches to Grid view; the dropdown always shows the active mode's icon and label, and a checkmark marks it in the menu. Reopening Accounts resets the view back to List.
- List view. Each row shows the account's avatar (or initials), name, an industry badge if the account has one, a subtitle with the owner's name (if set) and the account's user count, and a last-activity timestamp.
- Grid view. Each tile shows only the avatar, account name, and the word "Account" below it. It's the same tile Deals uses for its own account links, so it carries less detail than a list row.
Type in the search box to filter by name; it waits about 300ms after you stop typing before it searches, and clears with the X button that appears once you've typed something. Scrolling to the bottom of the list fetches the next page automatically in both views, even though only List view shows a visible scrollbar's worth of rows at a time.
If there are no accounts and no search in progress, the list shows "No accounts available." A search with no matches shows "No matching accounts" instead. If the list fails to load, it shows "Failed to load accounts."
Adding an account
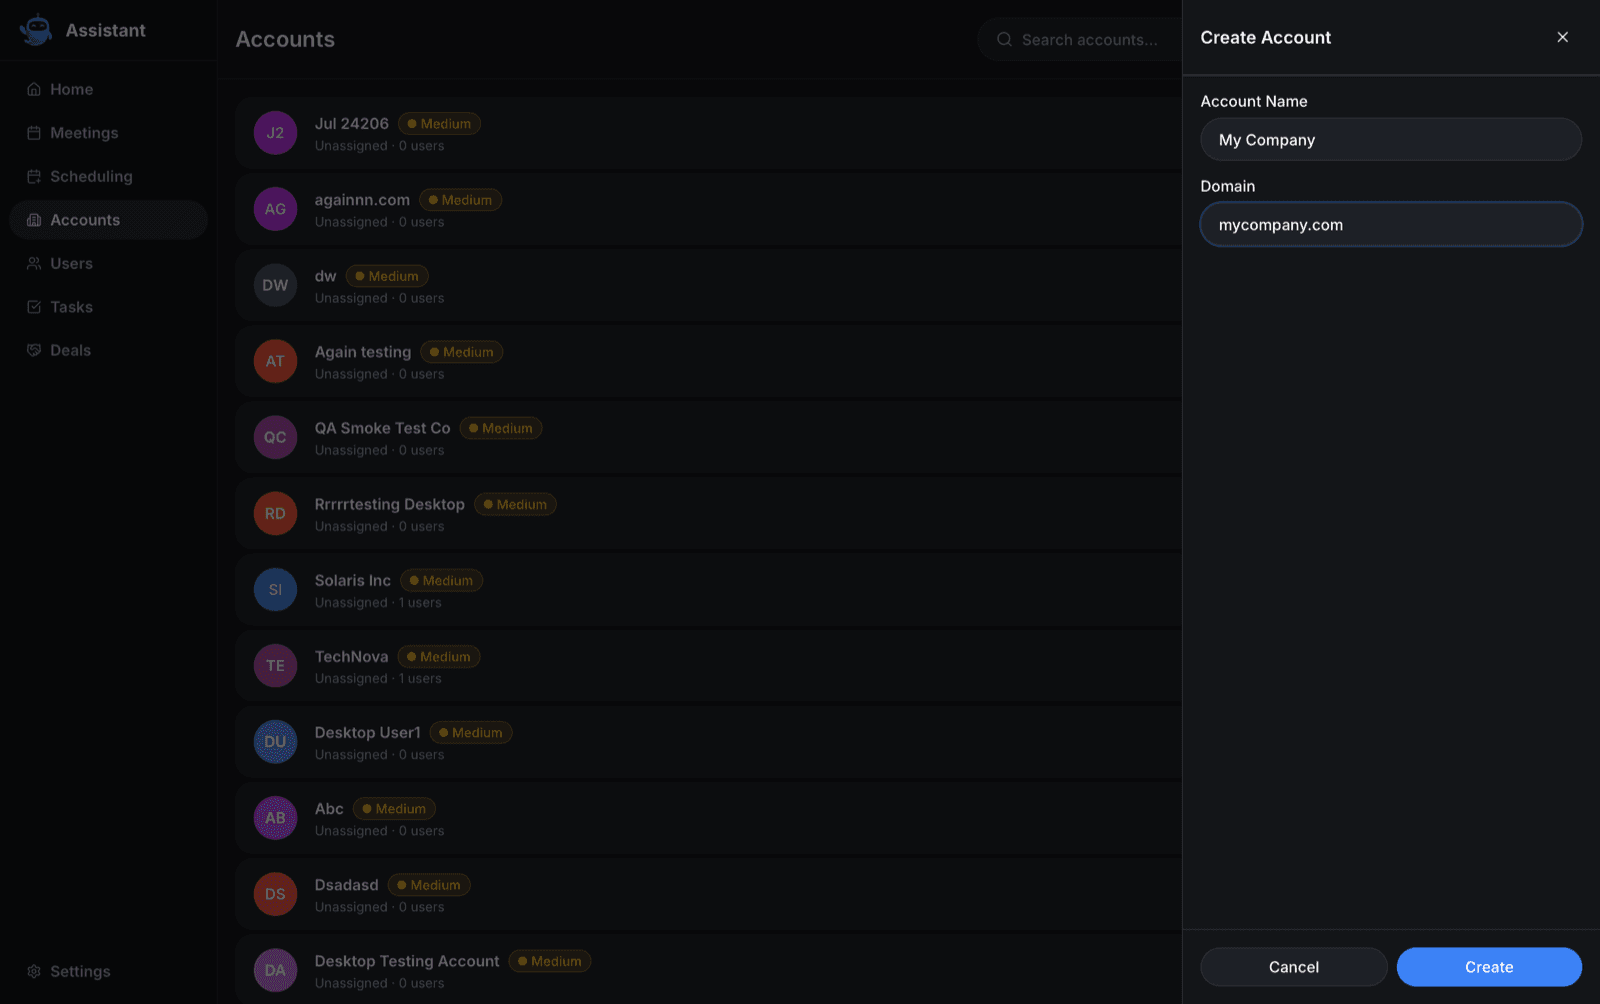
Click Add account to open a drawer with two fields: Account Name and Domain. Both are required. Click Create to submit; the button switches to "Creating..." while the request is in flight. A successful create shows a toast reading "Account created successfully" and resets the form. A failed create shows "Failed to create account."
📘 Good to know
The Domain field expects a web address, so typing a bare domain like "example.com" with no "https://" in front of it may get flagged by your browser's own validation before you ever click Create.
Opening an account
Click a row or tile to open that account at /accounts/{id}. The header shows a back button, the account's logo or initials, its name, and, where set, its domain and industry. Below the header, four tabs appear in this order: Overview, Activity, Users, Deals.
Opening an account that doesn't exist shows the same "No accounts available" message as an empty list, with a "Back to Accounts" button.
Overview tab
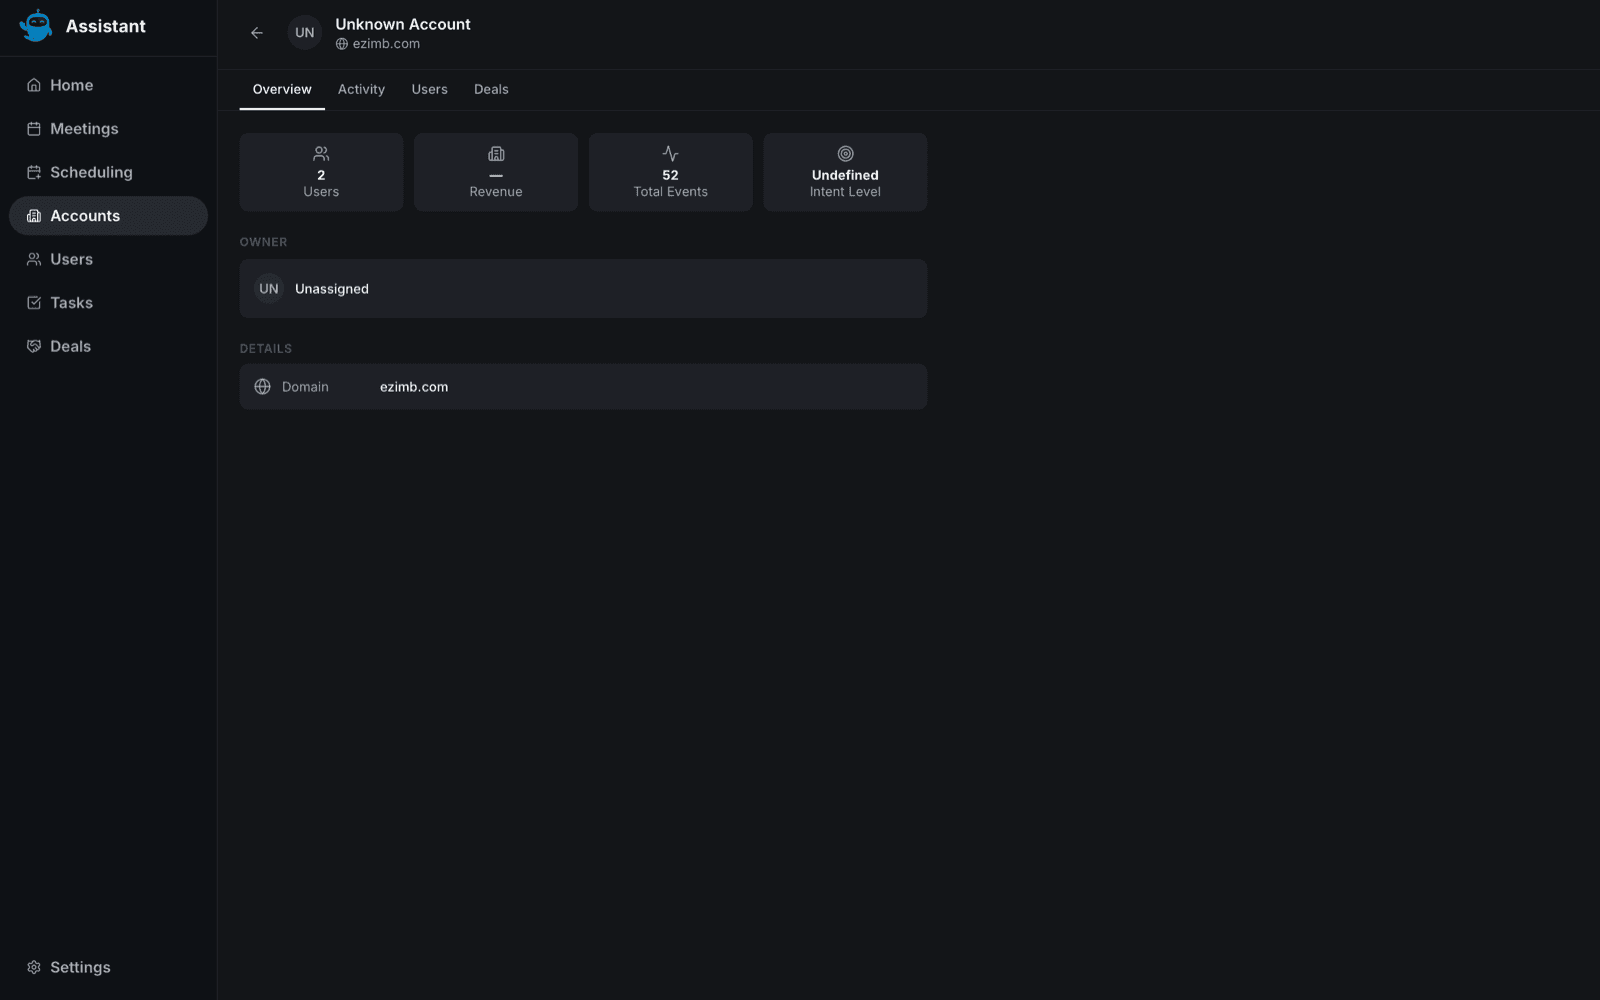
Four stat tiles across the top: Users (a count), Revenue (formatted currency, or a placeholder dash if the account has none), Total Events, and Intent Level (each showing a placeholder dash if there's no data yet).
Below the tiles, an Owner section always shows an avatar and name, reading "Unassigned" if the account has no owner set. A Details section follows: the Domain row and the Industry row each show up only when that specific field has a value.
Activity tab
Activity is grouped by day, then by the team member who logged it. Each row shows an icon, a one-line summary, and a timestamp. Every row currently shows the same default icon, whatever the underlying event type. With no activity yet, the tab shows "No activity recorded" and "Activity will appear here as interactions are tracked."
Deals tab
Every deal linked to the account appears as a card: its name, a stage badge if it has one, its value ("No value" if unset, otherwise formatted currency), and its close date if it has one. Click a card to open that deal. With no linked deals, the tab shows "No deals found" and "Deals will appear here when they are added to this account."
Users tab
This tab reuses the same contacts list and row layout as the standalone Users area, filtered to this account, so it's the same underlying data, not a separate copy. Unlike the standalone Users list's infinite scroll, this tab paginates with an explicit Load more button. Click a contact to open it. With no linked contacts, the tab shows "No users found" and "Team members will appear here once they are added to this account."
Moving between related records
You can land on an account from a contact's account card in Users, a linked account on a Deal's detail page, or an account chip on a Task's detail page. From inside the account, the Deals and Users tabs are your way back out to those linked records.
📘 Good to know
A Meeting's Prep tab shows the linked account's name as plain text, not a link, unlike the equivalent references from Deals, Tasks, and Users.
Where to go next
- Pipeline Overview for how Deals and Accounts work together as your pipeline.
- Desktop Sales Workflow Guide for working Deals from the desktop app, including the account card on a deal's detail page.
- Desktop App Overview for how Accounts fits into the desktop app's sidebar navigation.
Desktop Scheduling
Manage your booking types and weekly availability, and copy the Blu Auto-Scheduler email address, from the Scheduling screen in the Intempt desktop app.
Desktop Settings (Org/Project/Profile/Billing)
Switch organizations and projects, manage your org's plan and billing, and configure project-level preferences from the Intempt desktop app's Settings window.