
Users
Users is Intempt's universal contact database in the console: one profile per person across every event they've ever triggered, with a filterable list, bulk actions, and a multi-tab detail page shared by Marketing, Sales, and Analytics.
Covered in the Academy. Intempt Academy covers users step by step.
Overview
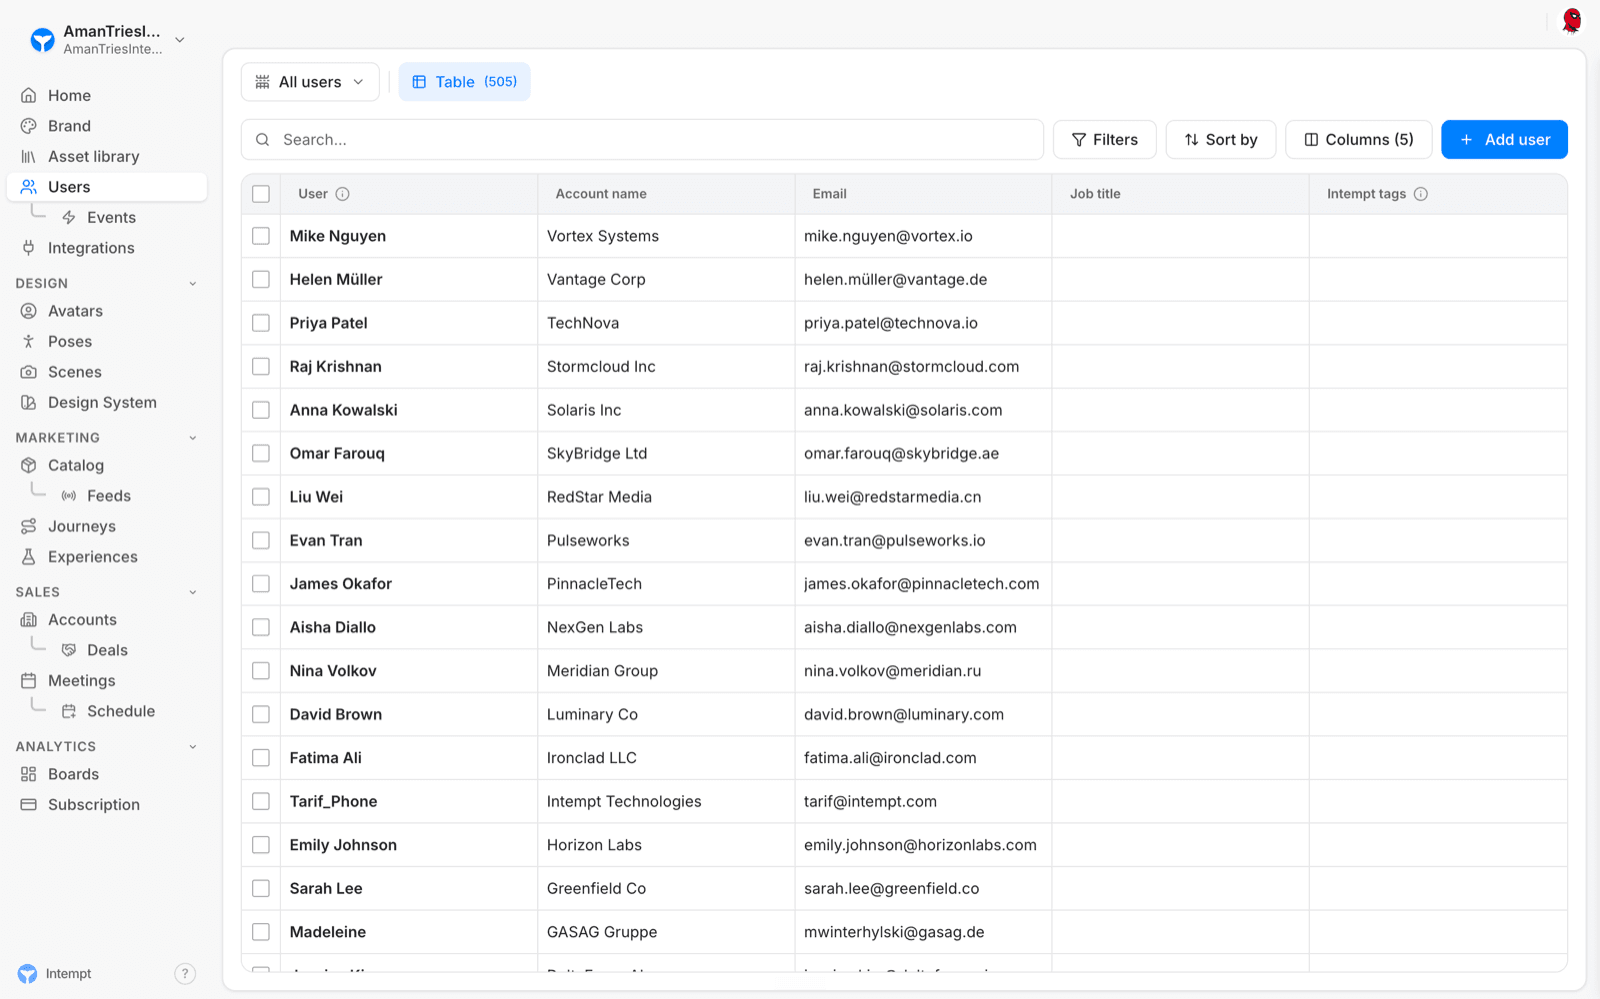
Users, at /users, is Intempt's core customer profile module in the console. Every person who triggers an event gets a profile here, built from their Master ID and the attributes attached to it, so the same Users list is the one place Marketing, Sales, Analytics, and every other part of the console reads and writes contact data. Users is a distinct module from Accounts: a user is an individual person, an account is a company or other group a user belongs to.
How it works
Browsing the Users list
The list selector at the top switches between All users and any custom list you've saved, each showing its own row count. Search the list, sort any column, and apply filters to narrow it down. Columns lets you add or remove columns from your configured attributes, including account-level attributes like Account name. A Refresh button reloads the current view, and the table loads more rows automatically as you scroll.
Creating a user
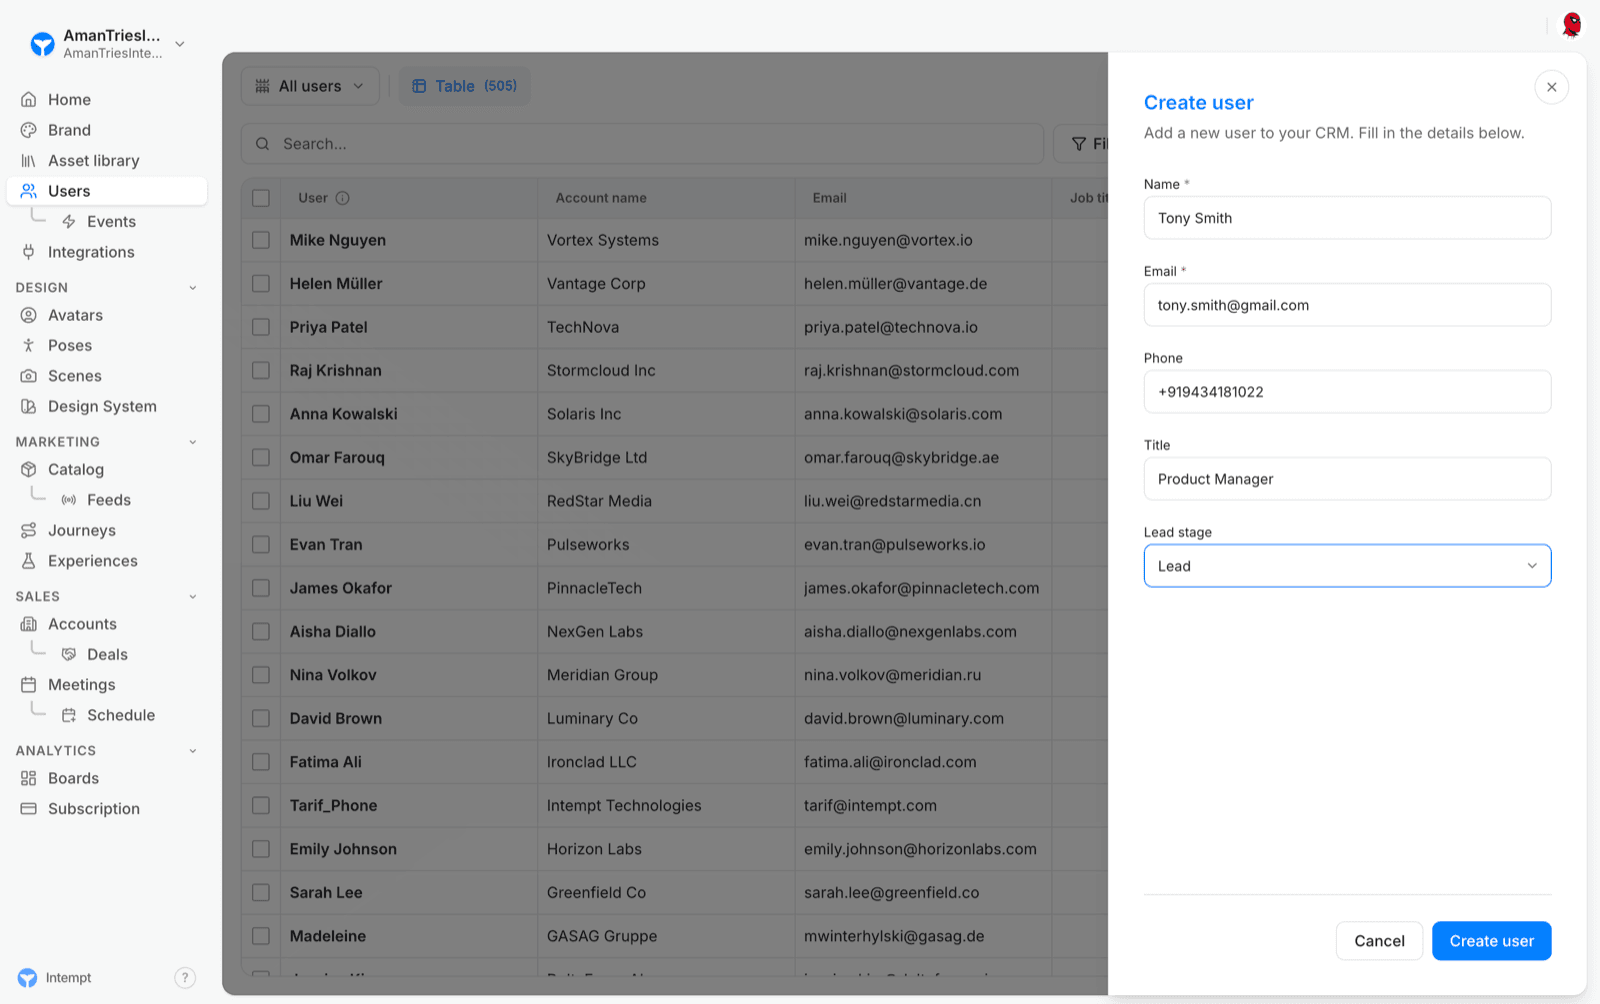
The create-user panel takes a name and email (both required), plus optional phone, title, and lead stage. Lead stage options come from your project's configured lifecycle stages.
Selecting and acting on users in bulk
Selecting one or more rows opens a bulk action bar:
- Create segment. Turns the selection into a named segment, reused as a targeting scope elsewhere in Intempt (Attributes, Experiences, Journeys).
- Tag. Applies one or more existing tags to every selected user, or creates a new tag from the same panel.
- Enrich. Runs a data enrichment job against the selection: Find Emails, Validate Emails, Enrich Profiles, Enrich Companies, or Find Phone Numbers. Each option only lists users eligible for it (for example, Find Emails only counts users with a name and company but no email on file).
- Assign owner. Assigns the selected users to a team member.
- Delete. Removes the selected users after a confirmation dialog.
Saving and switching views
Changing columns, filters, or sort on a list marks the view dirty. Save writes the changes back to the currently selected list; Save as new segment creates a new segment from the current view instead, through a panel titled "Save as new segment" with its own Save segment button. Cancel discards the unsaved changes and reverts to the list's last saved state.
📘 Good to know
You may see this same kind of saved view called a "list" here and a "segment" in the bulk-action bar's separate "Create segment" flow, depending on how it was created. The wording isn't fully consistent across the console yet.
Attribute-based columns, including AI-scored types
Every column beyond the built-in identity markers (name, first seen, last seen, and so on) comes from your project's configured Attributes. This includes the AI-scored attribute types, RFM, Likelihood, and Next Best Product, which appear as regular columns on the Users list once configured, the same as any other attribute.
User Details page
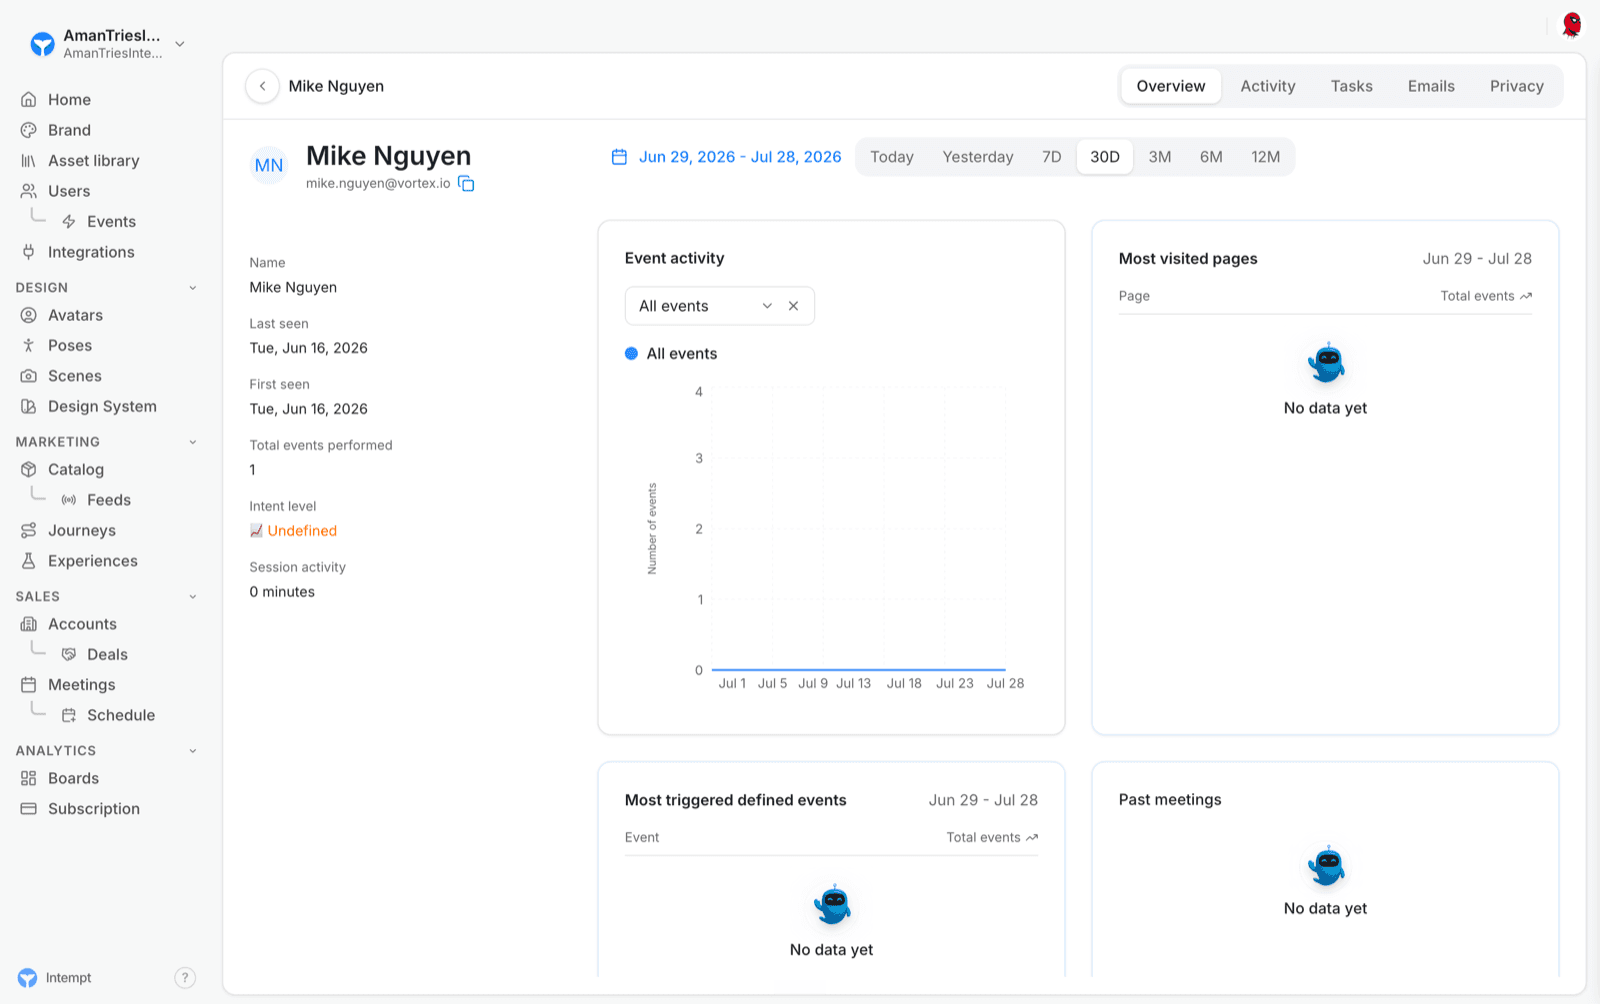
Clicking a row opens that user's Details page: a header with their avatar, name, and email (with a copy button), and a date range picker (Today, Yesterday, 7D, 30D, 3M, 6M, 12M) that controls the data in the tabs below it. A Draft AI message action (Email, LinkedIn, SMS, or Cold call script) generated by Agent Blu from your configured selling style and methodology, and a Meeting shortcut gated on a calendar integration being connected, are also available from this page. Below the header, five tabs cover different views of the same profile: Overview, Activity, Tasks, Emails, and Privacy. A sidebar next to the header lists whichever of the user's attributes have a value: tags, owner, account owner, name, website, industry, employee count, country, city, first seen, last seen, total events, intent level, score, session activity, and time zone.
Overview tab
An Event activity chart you can filter by event type, plus Most visited pages, Most triggered defined events, and Past meetings cards, each showing "No data yet" until there's something to show.
Activity tab
A day-by-day timeline of every event the user has triggered, filterable by date range, with a details panel for the selected event.
Tasks tab
A filterable table of tasks tied to this user, with the same column and filter controls as the main Tasks module.
Emails tab
The email thread history between your team and this user.
Privacy tab
The user's consent status by category, plus any recorded legitimate interest basis for processing their data.
Use cases
-
Finding your most active users. Sort the Users list by Total events or Last seen to see who's engaging right now.
-
Building a targeting list for a campaign. Filter the Users list down to the people you want, select them, and choose Create segment to reuse that group in a Journey or Experience.
-
Cleaning up incomplete profiles. Select users missing an email or phone number and run Enrich to fill in the gaps before outreach.
-
Prioritizing outbound by value or intent. Add an RFM or Likelihood column to the list so reps can sort by who's most worth calling first.
-
Handing off ownership when a rep leaves. Select their users and use Assign owner to move the whole book to someone else in one action.
-
Drafting a first outreach email. Open a user's Details page and use Draft AI message to get an Agent Blu-generated email based on your sales methodology.
-
Checking what a user has done before a call. Open the Activity tab and narrow the date range to the last few weeks to see their recent events at a glance.
-
Confirming a user can be emailed. Check the Privacy tab on their Details page before sending a marketing email to make sure they haven't withdrawn consent for that channel.
Where to go next
-
Segments for how a selection of users becomes a reusable targeting scope.
-
RFM Scoring & Scored Audiences and Predictive Attributes: Likelihood & Next Best Product for how the AI-scored attribute types shown as Users columns are configured.
-
Managing consents for how the consent categories shown on a user's Privacy tab are set up.
Accounts
Accounts is Intempt's CRM company-record module in the console: one record per company or group, with a filterable list, bulk actions, and a multi-tab detail page tied to that account's users, tasks, and deals.
Attributes
Attributes are named fields on a user's or account's profile, manually entered, calculated from events, or scored by an AI model. Segments, journeys, and analytics all read from the same attribute definitions.